Managing API Requests in E2E Test Automation (ATA)
This guide will walk you through how to manage API requests using the E2E Test Automation in All Things API (ATA). Whether you’re testing a single endpoint or working with a large set of APIs, this will help you organize and execute your requests with confidence.
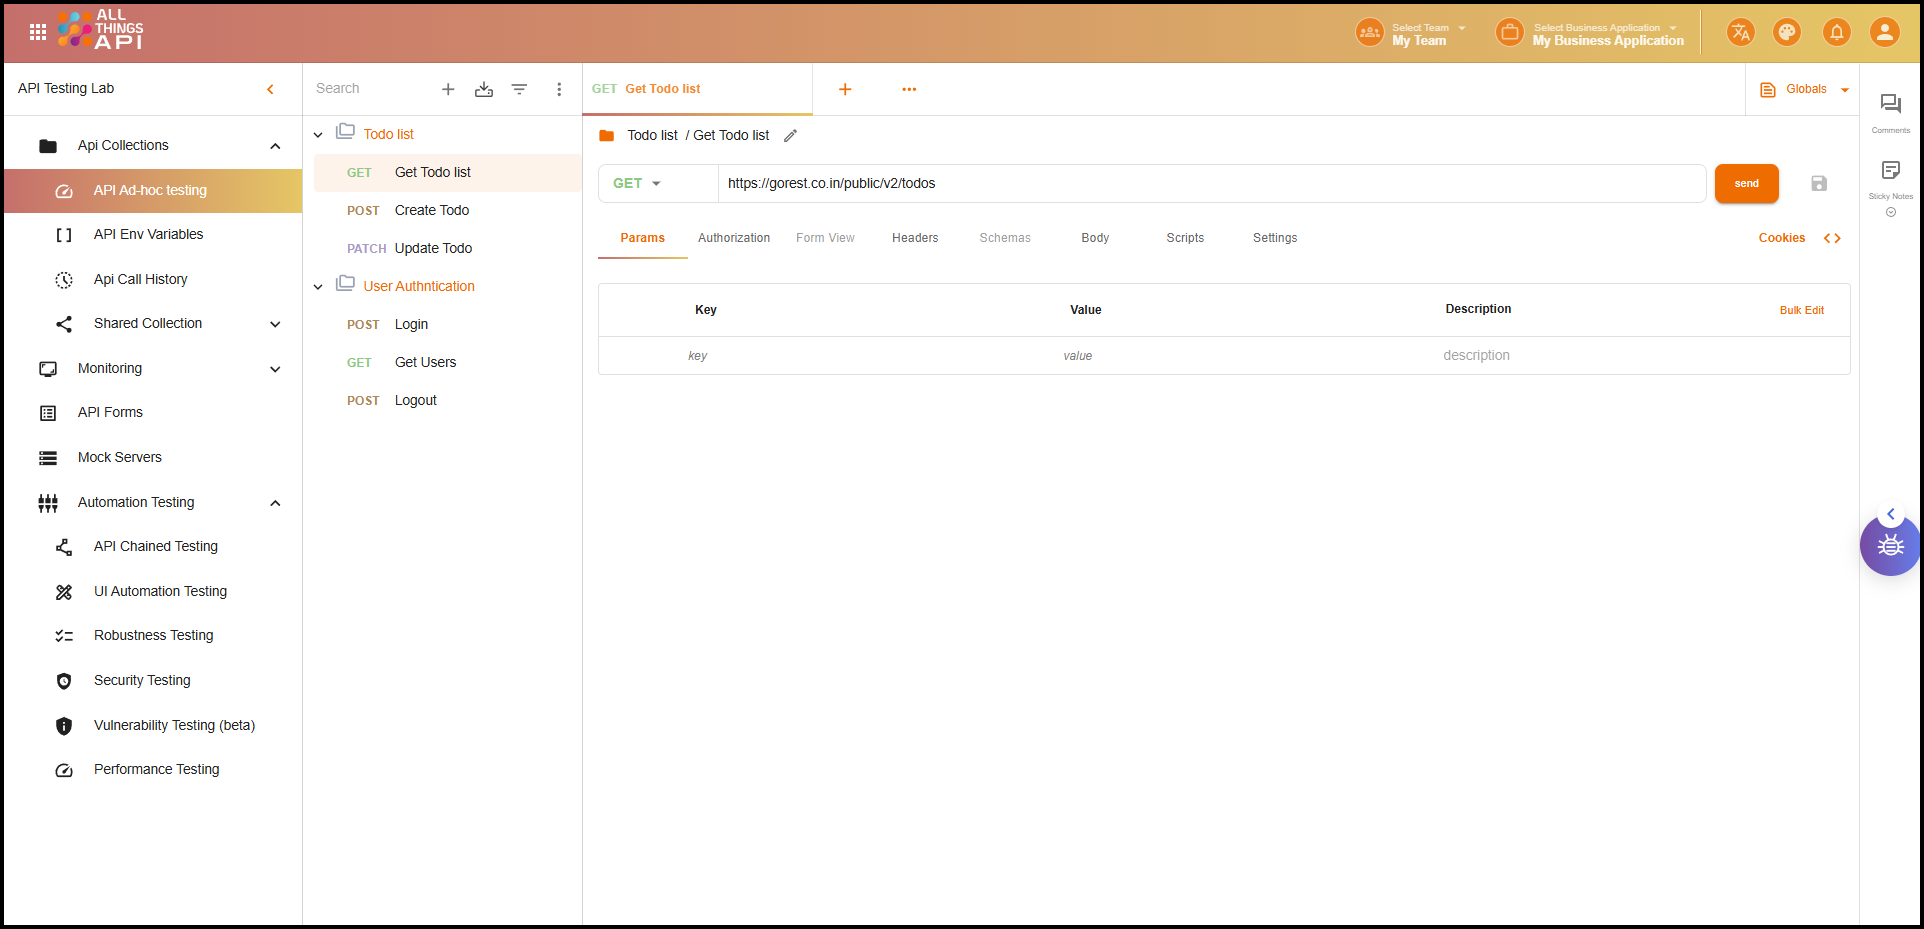
✅ Step 1: Navigate to API Collections
- Login to ATA using your credentials.
- From the homepage or left sidebar, click on E2E Test Automation.
- Inside E2E Test Automation, click on the API Collections tab.
- Expanding the API collctions there is API Ad-hoc Testing. Click on that.
This is where all your API testing and organization will happen.
📁 Step 2: Create a New API Collection
- Click the “+” icon at the top or the “Create” button.
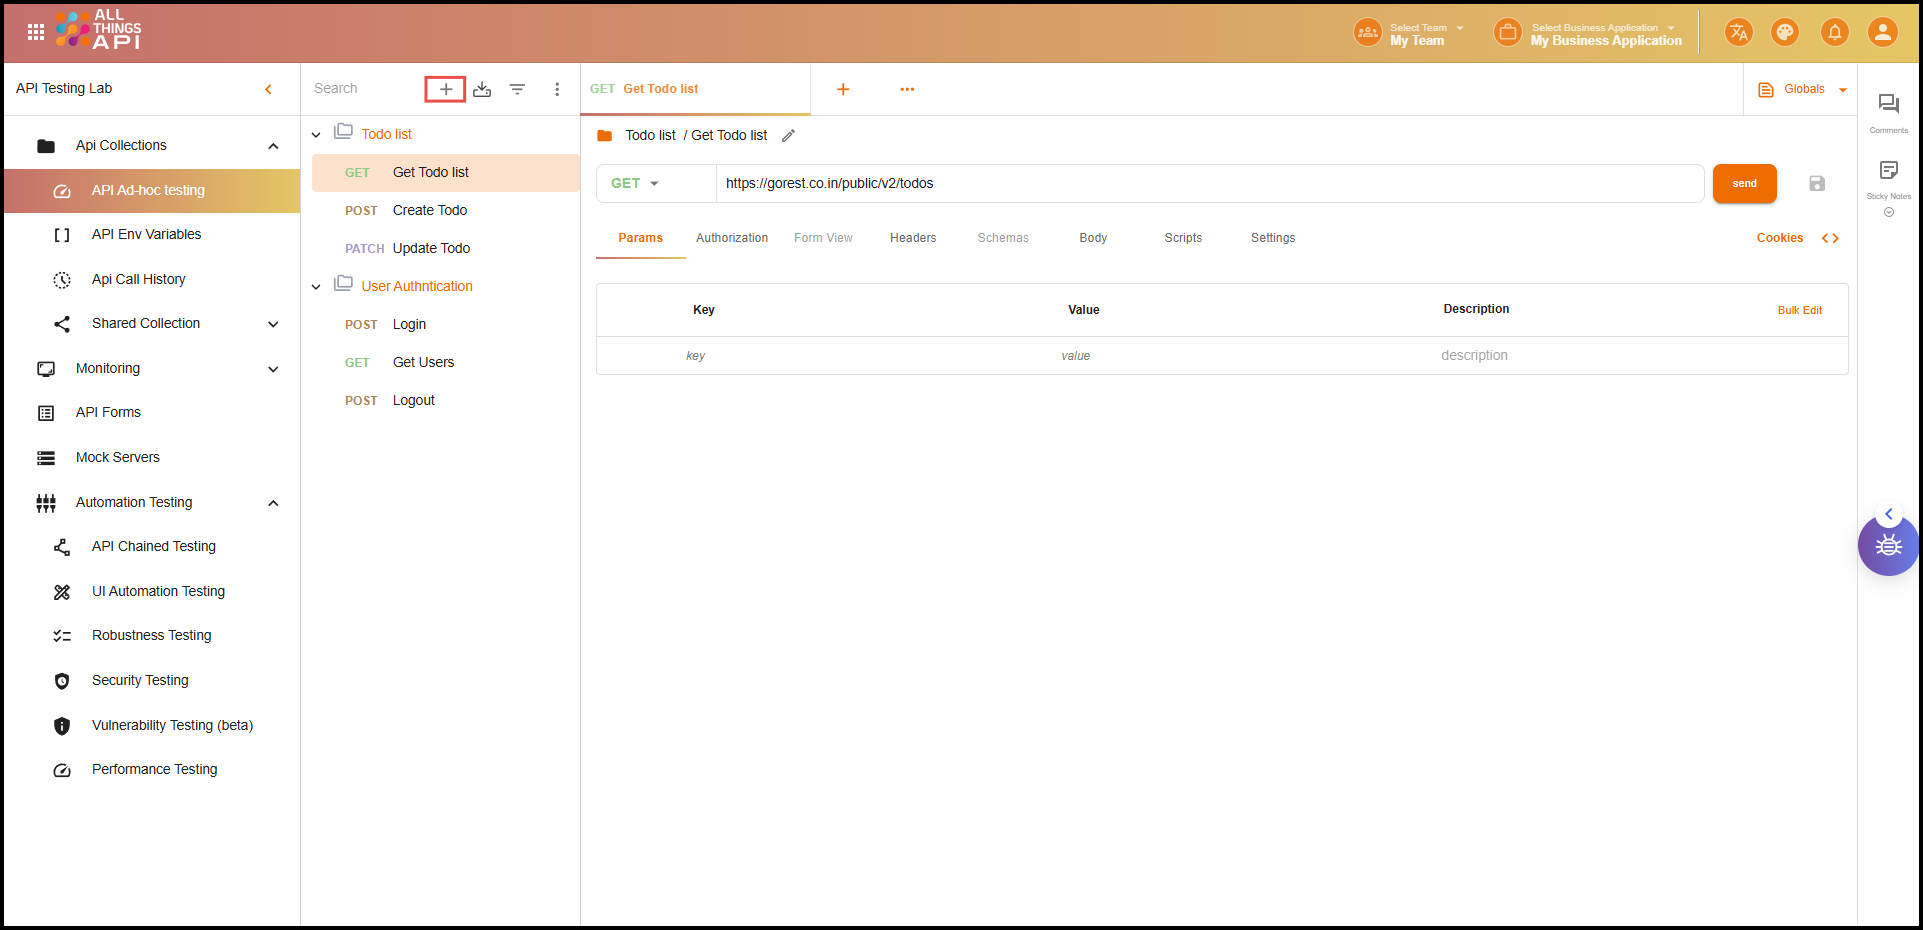
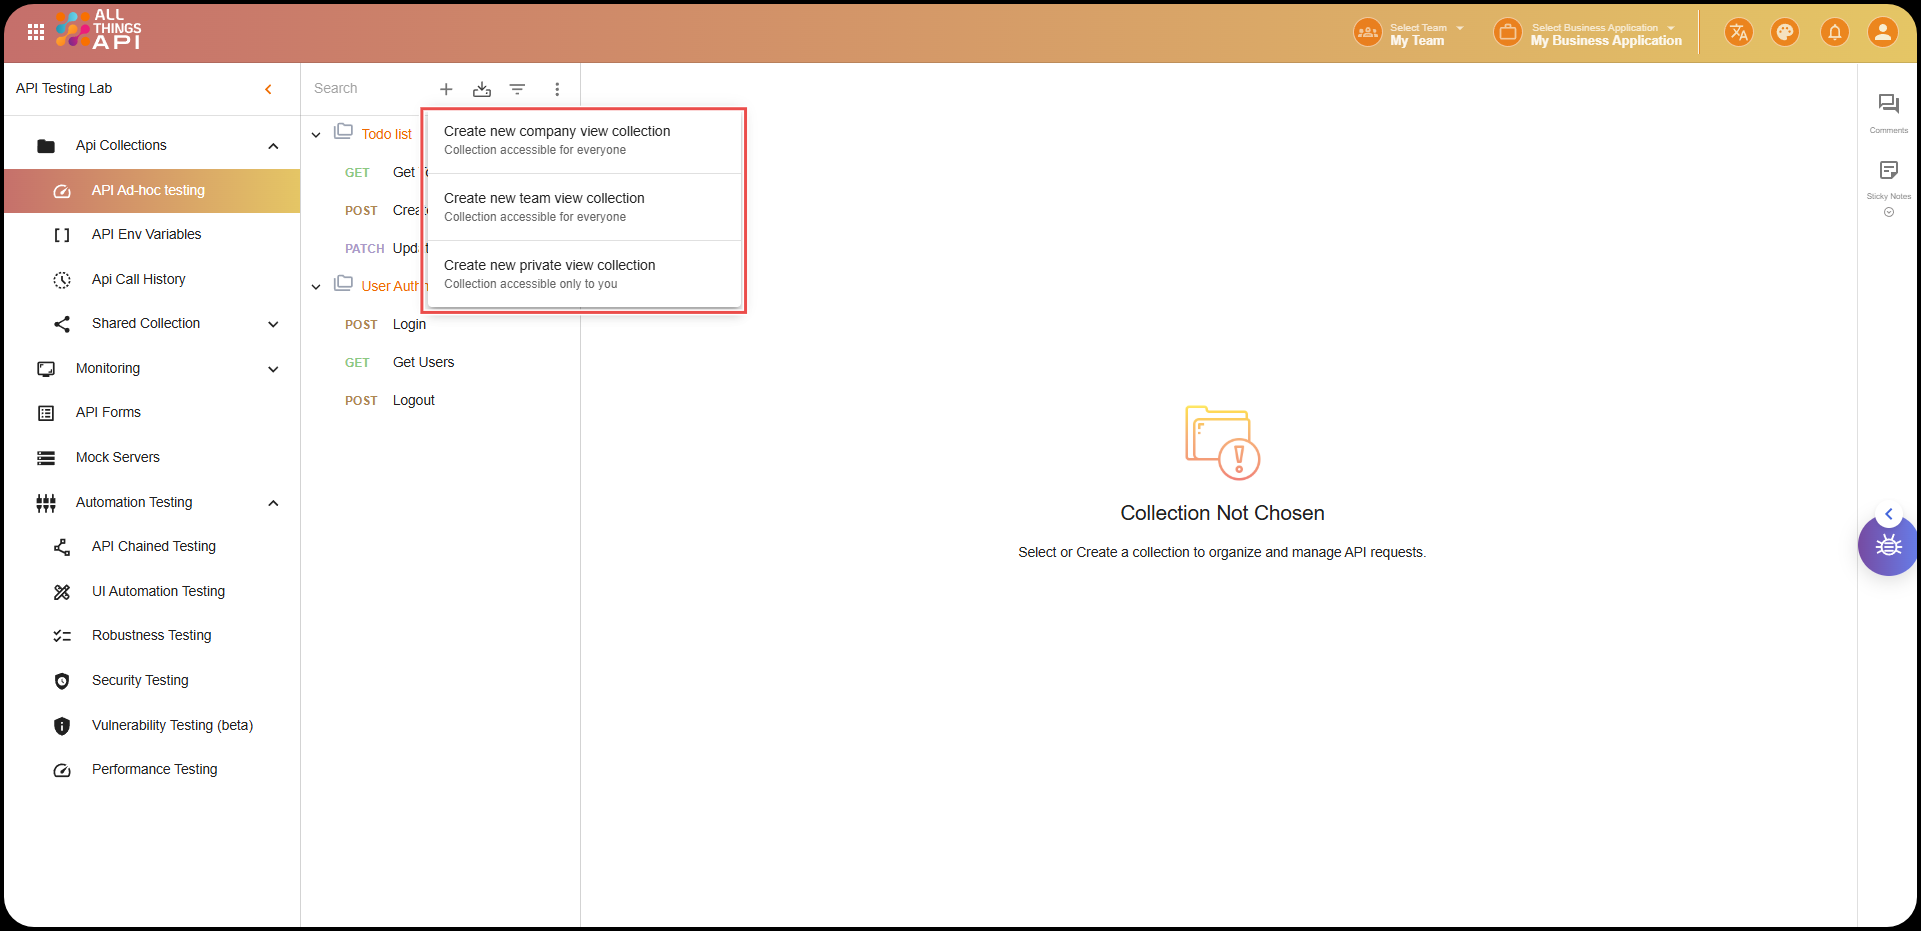
- Choose the type of collection you want:
- Team View Collection: Shared with everyone in your team.
- Company View Collection: Shared with all members of your company.
- Private View Collection: Only you can see and use this.
- Clicking on it will create a new API collection named as New Collection.
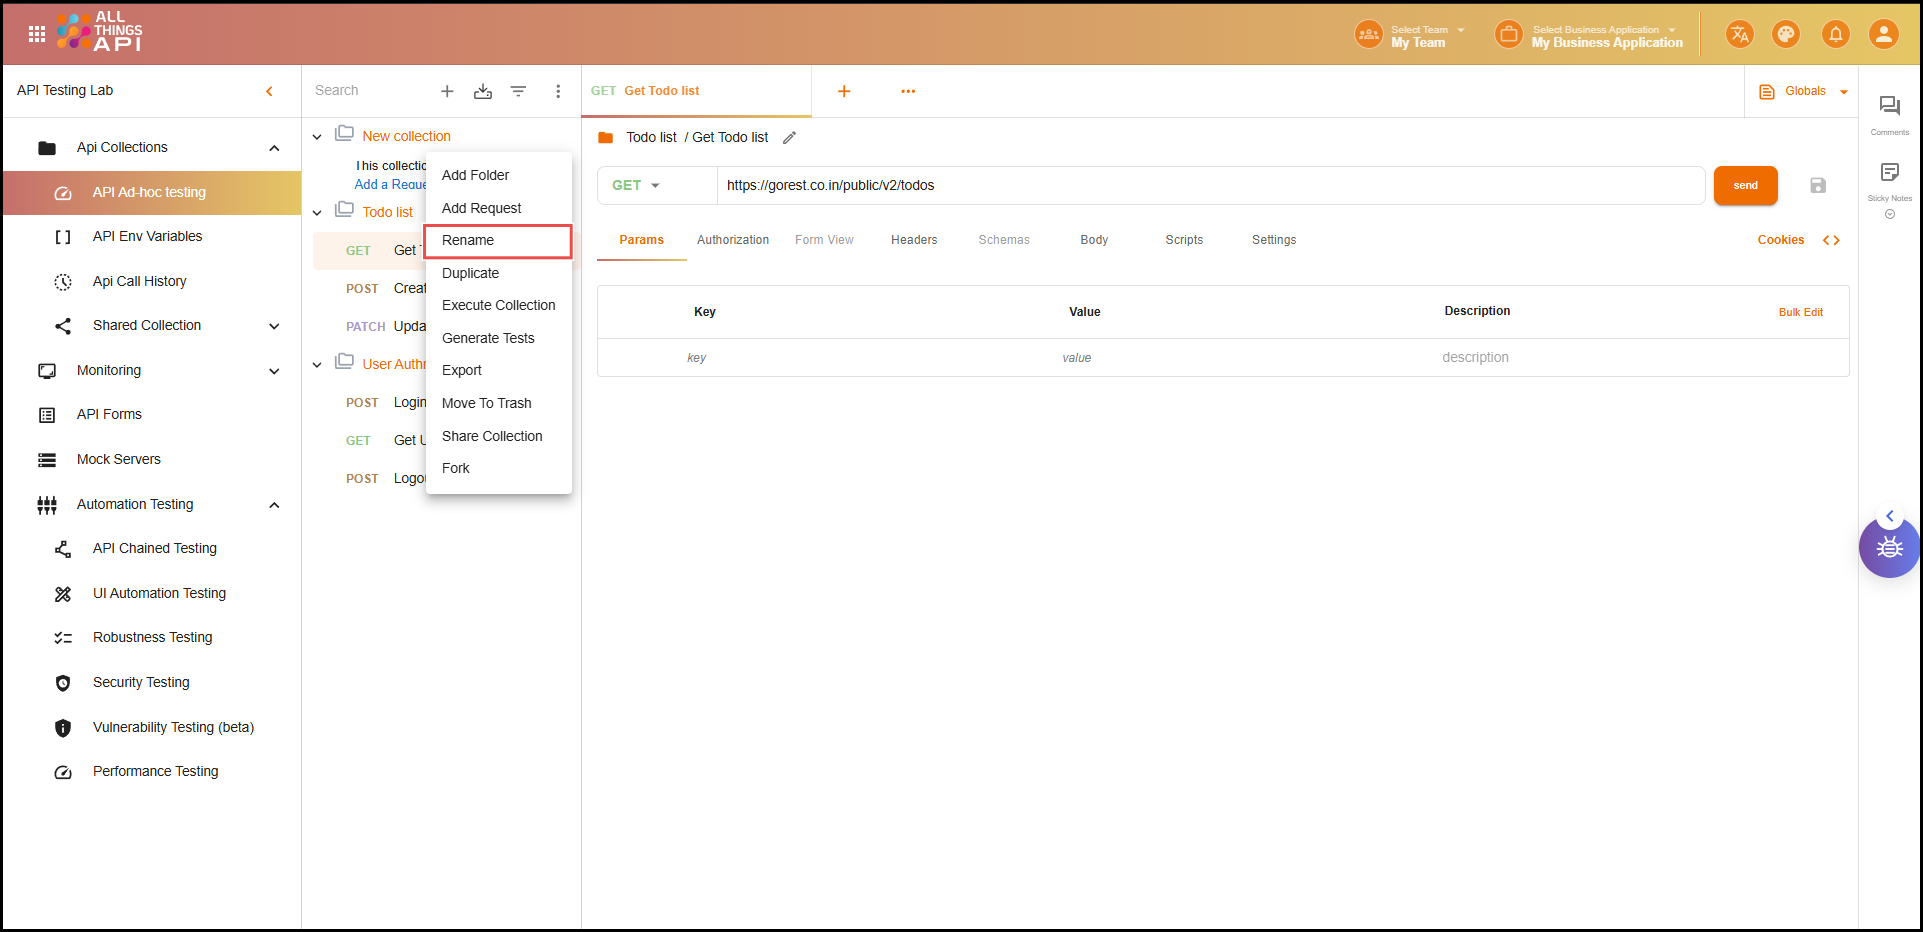
If you need to change the name of an existing API collection, follow these steps:
- Click the three-dot menu next to the API collection you want to rename.
- Select Rename from the menu.
- Enter the new name for the collection and confirm.
Note: Choose a name that clearly reflects the purpose and usage of the collection. This helps keep your workspace organized and easy to understand for you and your team.
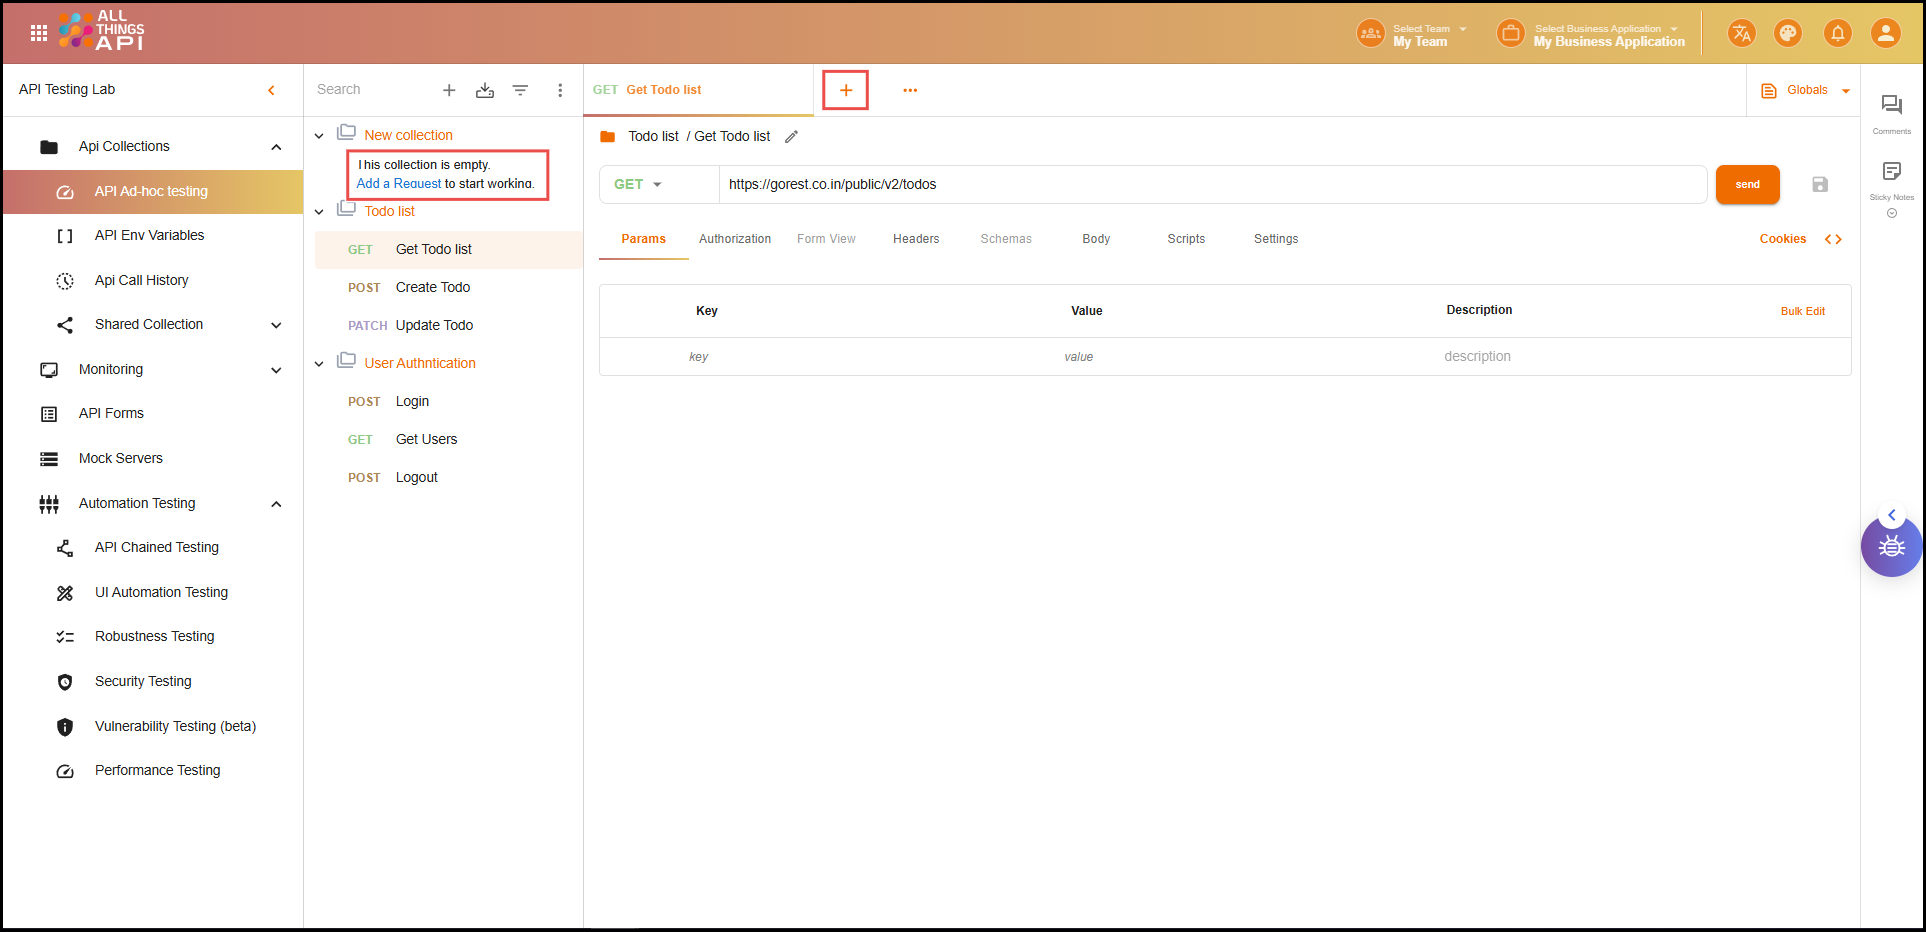
➕ Step 3: Add API Requests
API requests must belong to a collection — you can’t create them standalone.
- Click on the collection to expand it.
- Click on “Add Request”.
- A new tab opens where you can configure your API request.
Configure the Request
After opening a new request tab, you’ll need to fill in the necessary details to define how the request should be sent and what it should include. Below are the key components you can configure:
- HTTP Method: Choose GET, POST, PUT, DELETE, etc.
- URL: Paste your API endpoint (e.g.,
https://api.example.com/users). - Headers: Add custom headers like
Content-Type,Authorization, etc. - Body: For POST/PUT, add request data (JSON, form data, etc.).
- Params: Add any query or path parameters.
- Authentication: Set up Bearer tokens, API keys, etc.
- Pre-request or Test Scripts (optional): Add custom logic using JavaScript.
Click Send to execute the request and view the real time response.
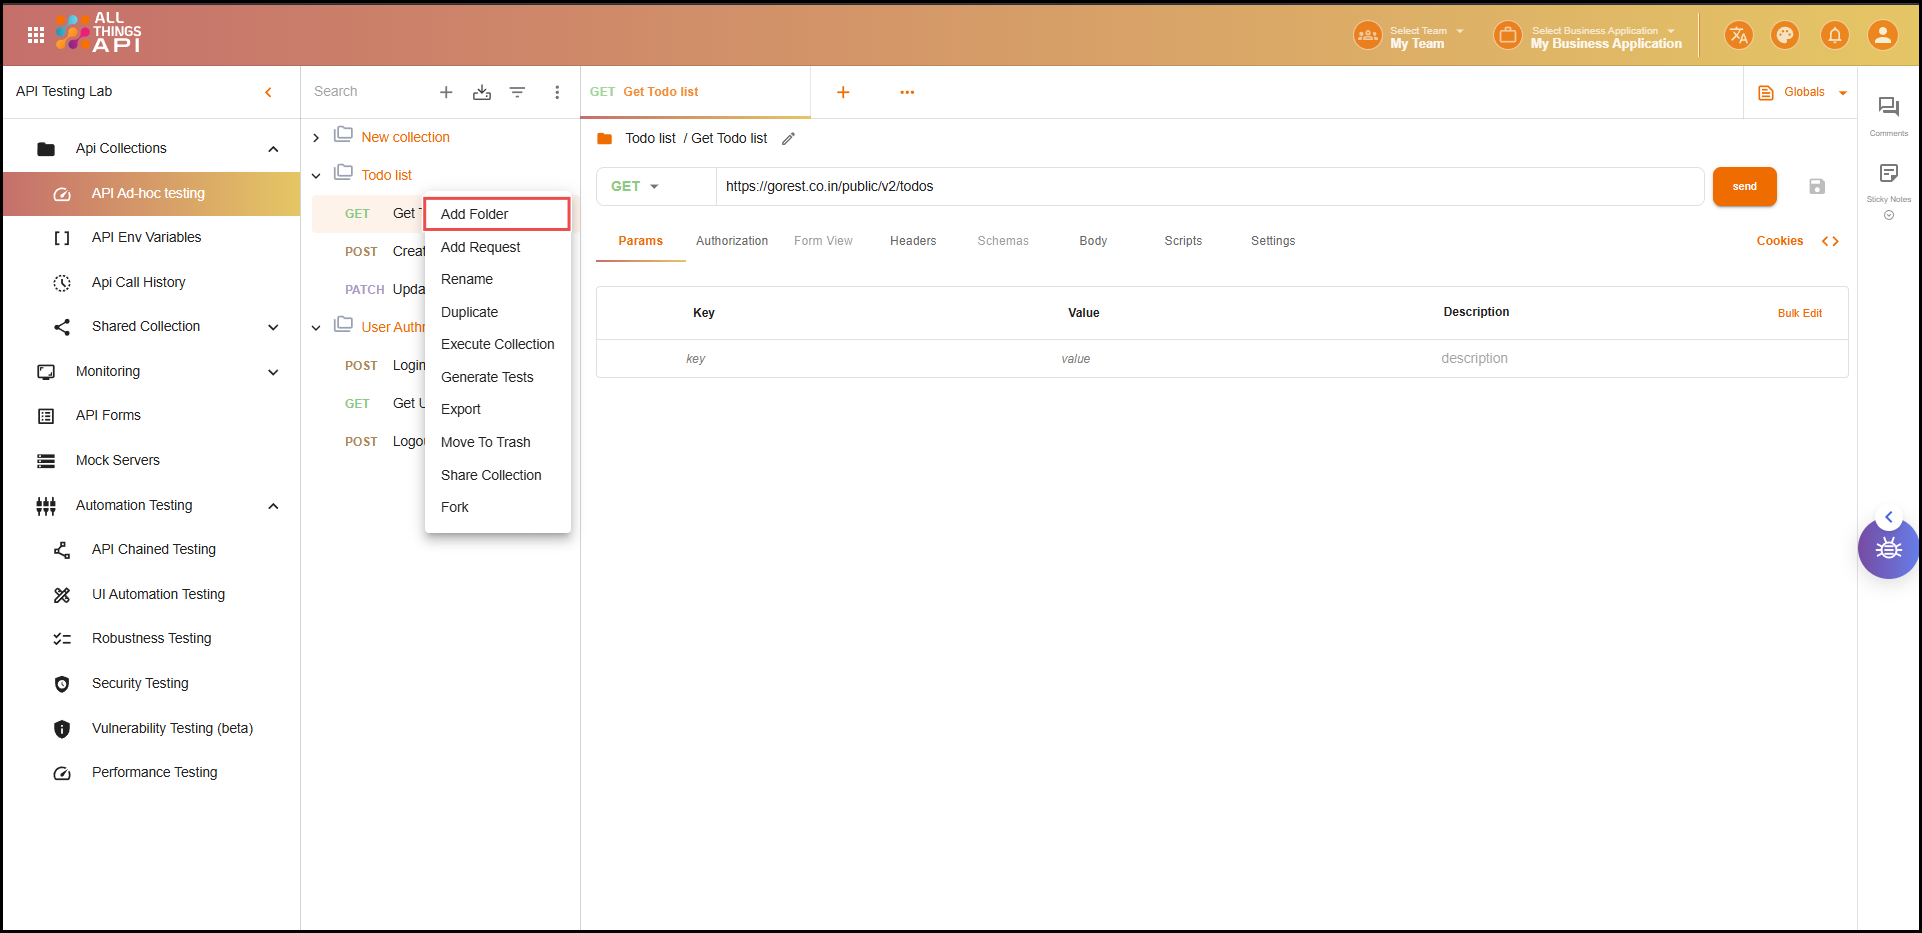
🗂️ Step 4: Organize with Folders and Sub-Folders
Collections can get large. Use folders to stay organized.
- Click the three-dot menu next to your collection.
- Select “Add Folder” and name it (e.g., “User APIs”, “Payments”).
- You can add requests into folders to keep your structure clean.
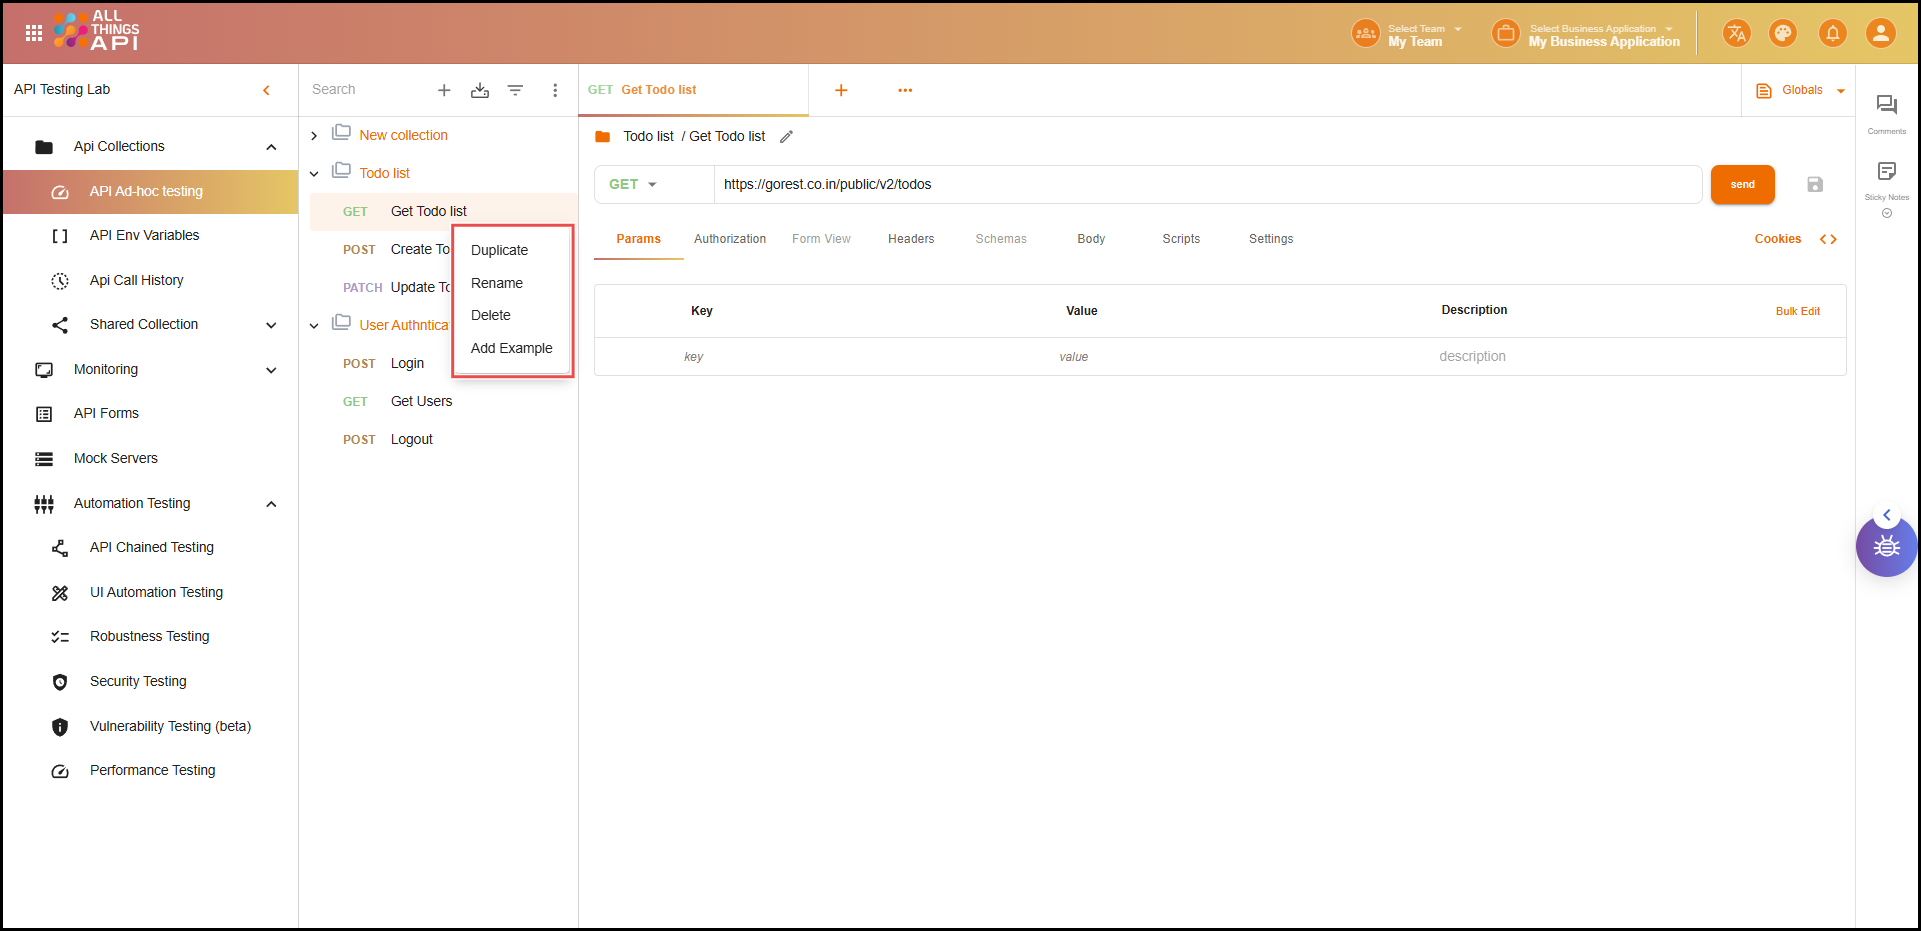
✏️ Step 5: Manage Existing Requests
Click the three-dot menu next to any request to:
- Rename: Give it a meaningful name.
- Duplicate: Copy it for testing with different inputs.
- Delete: Remove it from the collection.
- Add Example: Save a version of the request and its response for documentation or reuse.
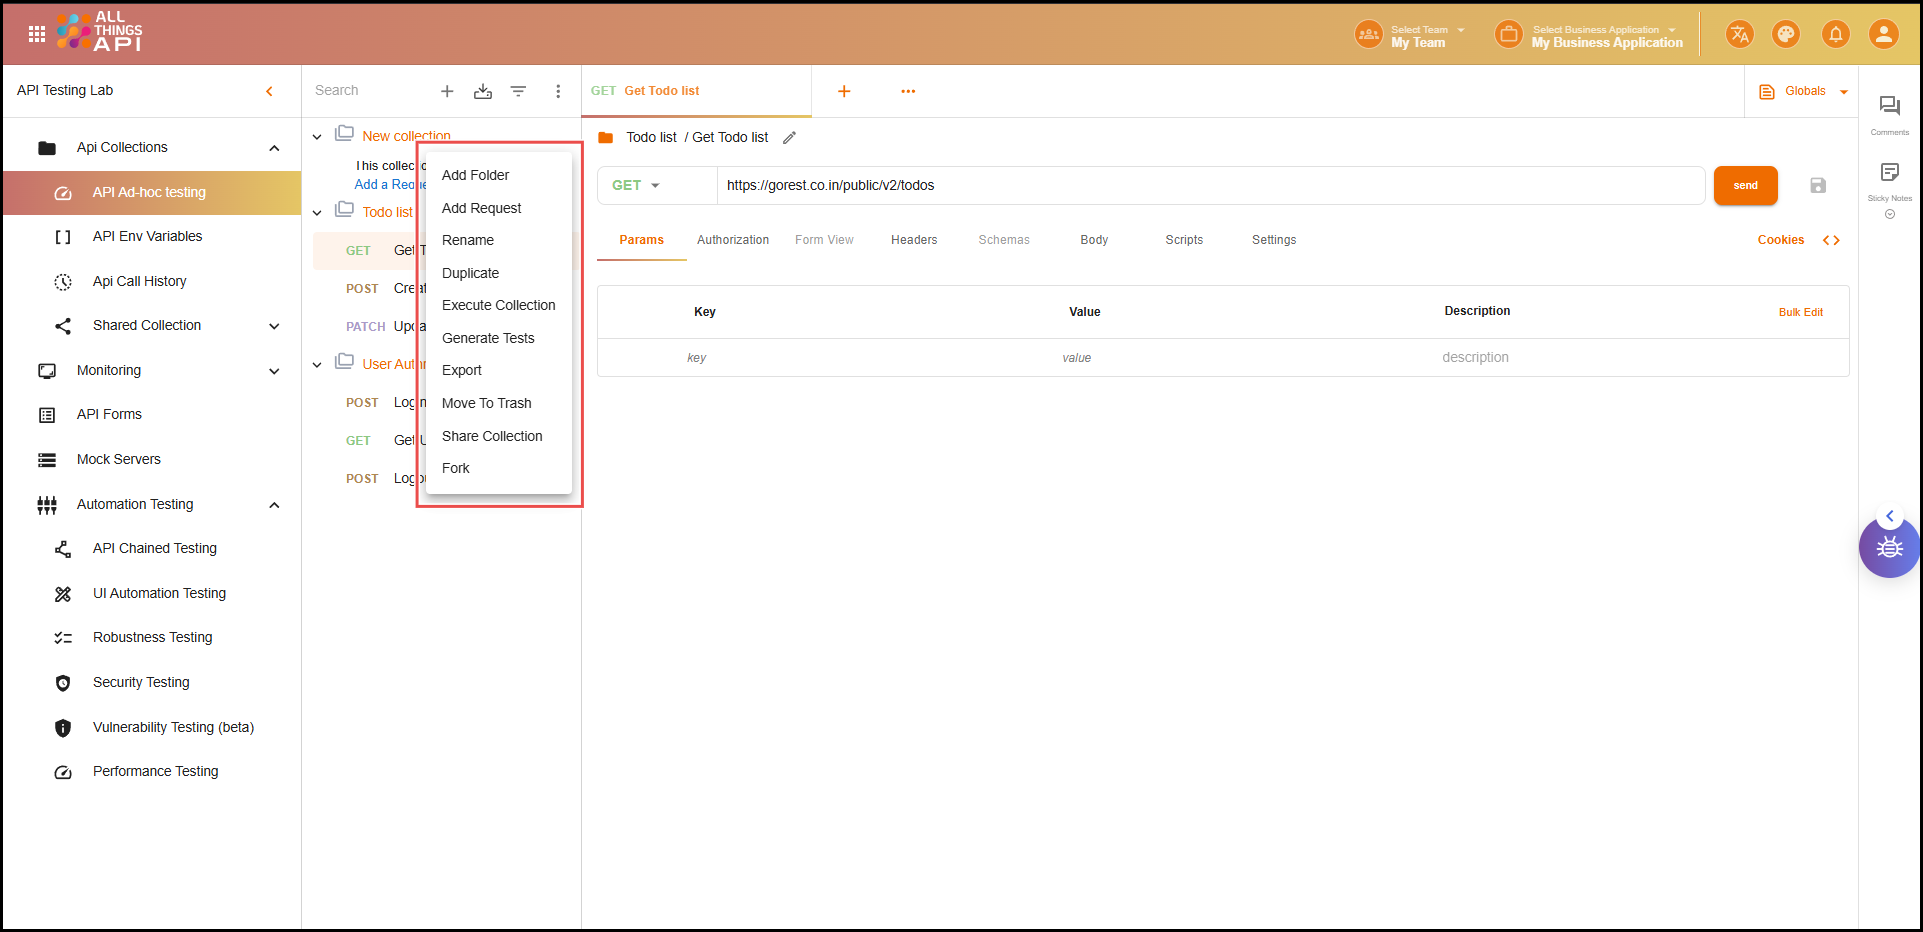
📚 Step 6: Manage the Whole Collection
Each collection has its own three-dot menu for advanced management options. These tools help you organize, test, and collaborate more efficiently:
- Add Folder: Create a new folder inside the collection.
- Add Request: Add a new request directly to the collection or a specific folder.
- Rename: Rename the entire collection.
- Duplicate: Make a copy of the collection for testing or reuse.
- Execute Collection: Run all requests sequentially to simulate end-to-end workflows.
- Generate Tests: Automatically create basic test cases (e.g., check response codes, validate fields).
- Export: Download the collection as a JSON file for backup or import into other tools.
- Move to Trash: Soft-delete the collection. It stays recoverable for 30 days.
- Share Collection: Collaborate by sharing with team members or external users.
- Fork: Create a separate editable copy of the collection. Useful when experimenting or creating variations without affecting the original.
📊 Collection Dashboard
Clicking on any collection opens a Dashboard view, which provides visual insights and performance metrics for that collection:
- Total Requests: Shows how many API requests are in the collection.
- Response Code Distribution: Displays a breakdown of response status codes (e.g., 2xx, 4xx, 5xx) in percentage.
- Security Overview: Highlights non-secured APIs (e.g., missing authentication or HTTPS).
- Top Performing APIs: Lists requests with the best performance in terms of response time and stability.
- Execution History: A timeline of recent test runs and outcomes.
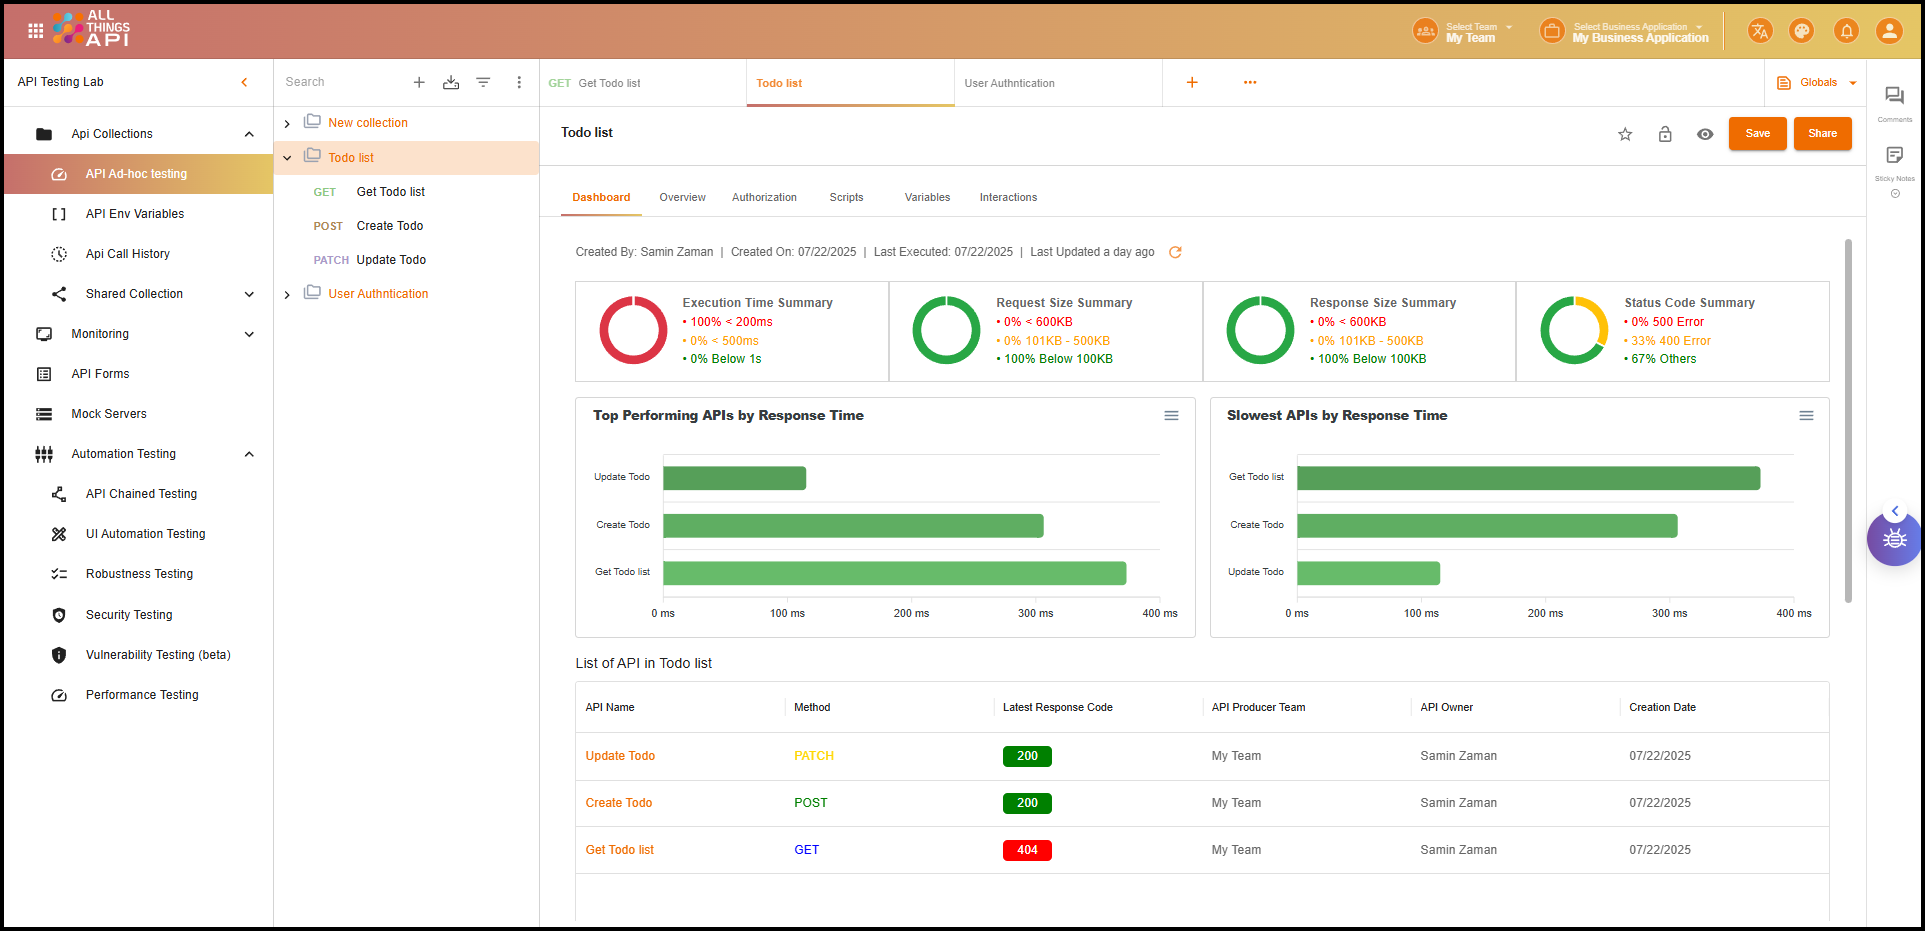
This dashboard helps teams monitor test quality, detect issues early, and continuously improve API reliability.
⭐ Step 7: Favorite Collections
- Click the star icon beside any collection to mark it as a favorite.
- Favorites are pinned to the top of the sidebar.
- This is only visible to you, not your team.
🔄 Step 8: Share & Set Permissions
- Click “Share Collection” from the collection menu.
- Select people from your team or other companies.
- Choose access levels (e.g., read-only or full access).
Shared collections are instantly available to selected users.
You’re now ready to manage your API requests like a pro with ATA’s API Lab! 🚀