📘 Creating a New Product in All Things API (ATA)
The “Create Product” feature in All Things API (ATA) allows users to initiate a new documentation workspace tailored for a specific API, software product, or digital service. Each product serves as a modular and independent environment, ensuring teams can collaborate on documentation projects with complete separation and control.
Creating a product is the foundational step in the documentation lifecycle. It defines the boundary for managing:
- Versions and version settings
- Tabs and pages
- Custom domains
- Design and layout templates
- Multilingual support
- Analytics and AI assistant settings
This feature ensures that every product in your organization has its own branded, maintainable, and extensible documentation hub.
Create a New Product
Follow these steps to create a new documentation product:
1. Navigate to the Dashboard
- Log in to your All Things API (ATA) account.
- From the left-hand navigation panel, select Dashboard.
2. Click on “Add New Product”
- Click the “+ Add New Product” button.
- A pop-up modal or drawer will appear with a product creation form.
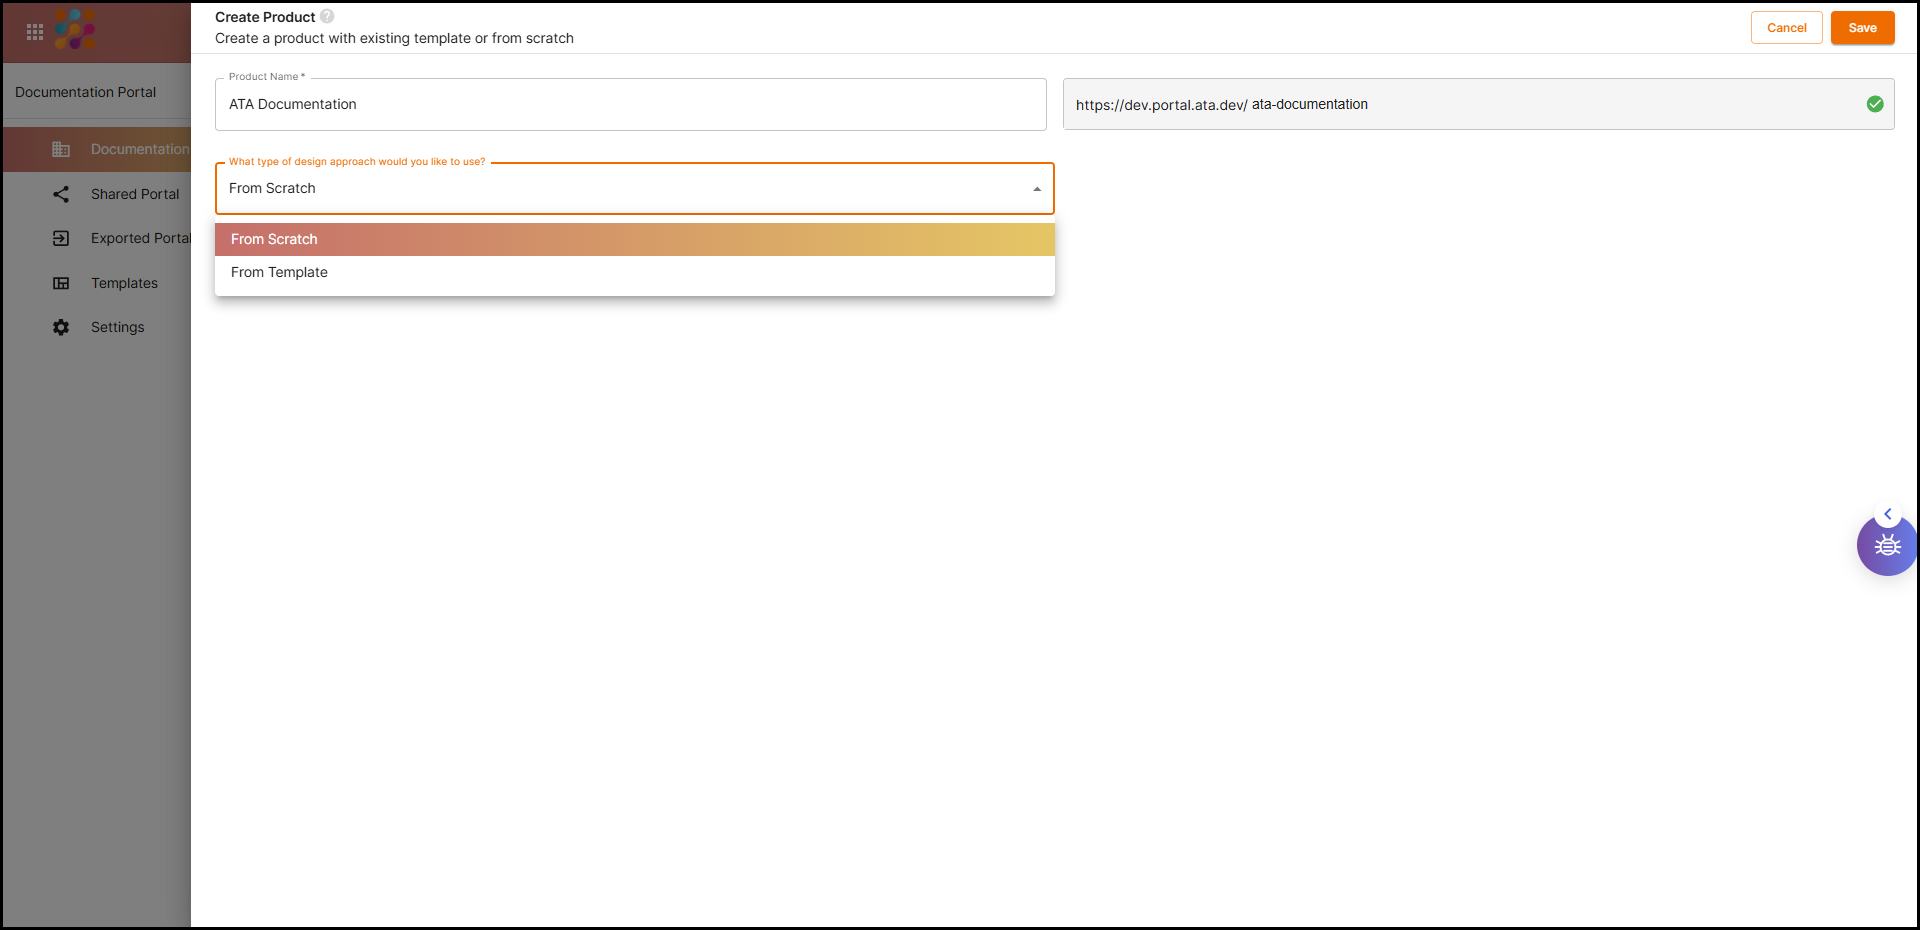
3. Enter the Product Name
- Provide a clear and descriptive name that reflects the API, product, or service.
- This name will also be used to generate the default documentation URL.
4. Choose a Design Mode
You have two setup options:
- From Scratch
- Begin with a blank structure.
- Ideal for teams that want full control over how tabs, pages, and styling are set up.
- From Template
- Choose from predefined templates offered by ATA.
- A great starting point for quick setup and standardized documentation patterns.
5. Confirm Domain Availability
- ATA auto-generates a default URL based on your product name (e.g.,
https://docs.ata.dev/my-product). - You can edit the domain and the system will validate its availability in real time.
6. Click Save
- Once all fields are complete and the domain is verified, click Save or Submit.
- Your new product will be created and listed in your dashboard.
✅ After Creation: What’s Next?
Once the product is successfully created:
- It will appear in your Product Dashboard.
- You can start:
- Adding and managing documentation versions
- Creating and organizing tabs and pages
- Applying custom branding and styling
- Configuring AI support or translation settings
🛠️ Each product acts as a standalone unit, providing teams with flexibility to manage content, share drafts, and iterate independently from other projects.
⚙️ Product Settings and Basic Configuration
The Product Settings section allows you to fine-tune key attributes of your product workspace. These configurations support team-specific workflows and branded publishing.
🔧 How to Configure Product Settings
- Open the Product’s Menu
- Click the three-dot (⋮) icon on the product card in the dashboard.
- Select “Settings”
- This opens the product’s configuration panel.
- Edit Product Metadata
- Update the product name and description as needed.
- Toggle AI Support
- Enable or disable the built-in AI assistant for that product.
- When enabled, AI can answer user queries based on the documentation content.
- Configure Custom Domain
- Assign a custom domain like
docs.company.com. - Validate and assign the domain to replace the default ATA URL.
- Assign a custom domain like
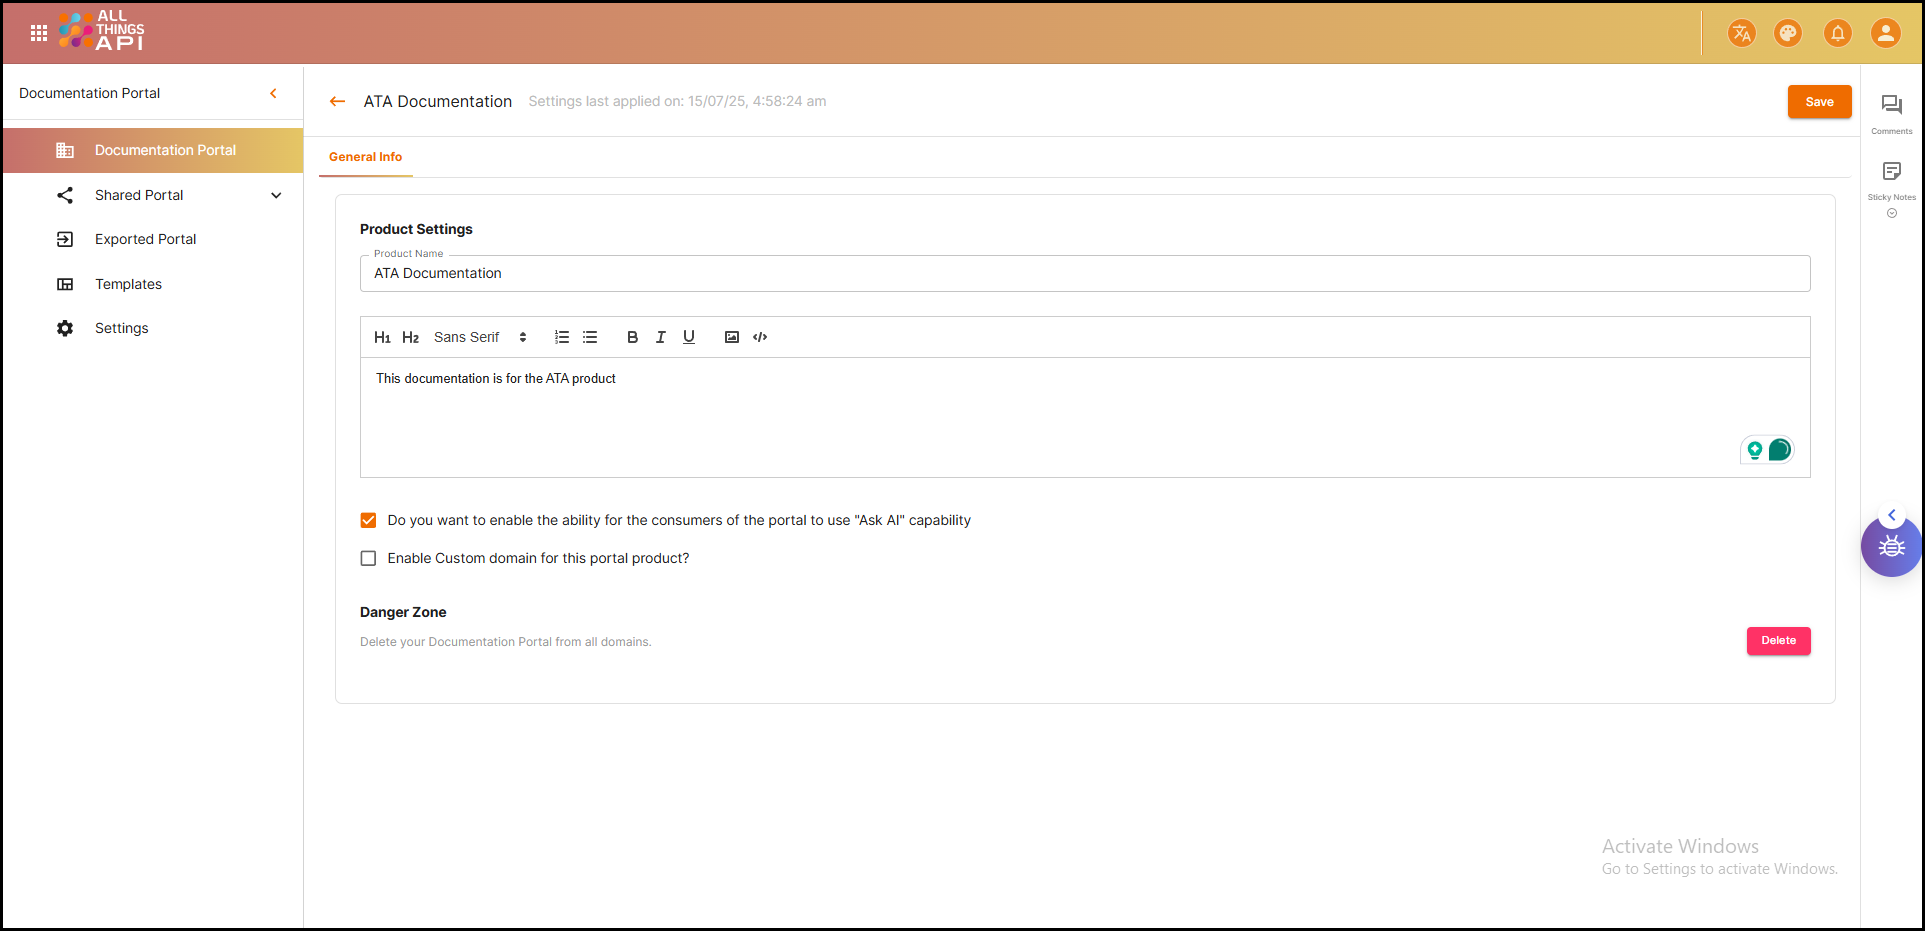
📝 These settings ensure that your documentation product is not only functional but also aligned with your branding, accessibility needs, and documentation goals.
Summary
The Create Product feature in ATA forms the backbone of your documentation strategy. It provides a clean, modular structure for organizing API or product documentation across teams. From design flexibility to domain branding and multilingual readiness, each product is equipped with tools to support a complete, scalable, and collaborative documentation experience.