⚙️ How to Configure API Requests in E2E Test Automation (ATA)
This guide walks you through every step required to configure and execute API requests in All Things API (ATA). Whether you’re new to API testing or just getting started with ATA, this documentation is designed to help you understand each element clearly and confidently.
🧩 1. Enter the API URL
Every API call starts with the endpoint URL — this is the address where your API lives (like a web address).
Steps:
- Open or create a new API request under a collection.
- You will see a URL input field at the top.
- Paste your full endpoint here. Example: https://api.example.com/users
This URL tells ATA where to send the request.
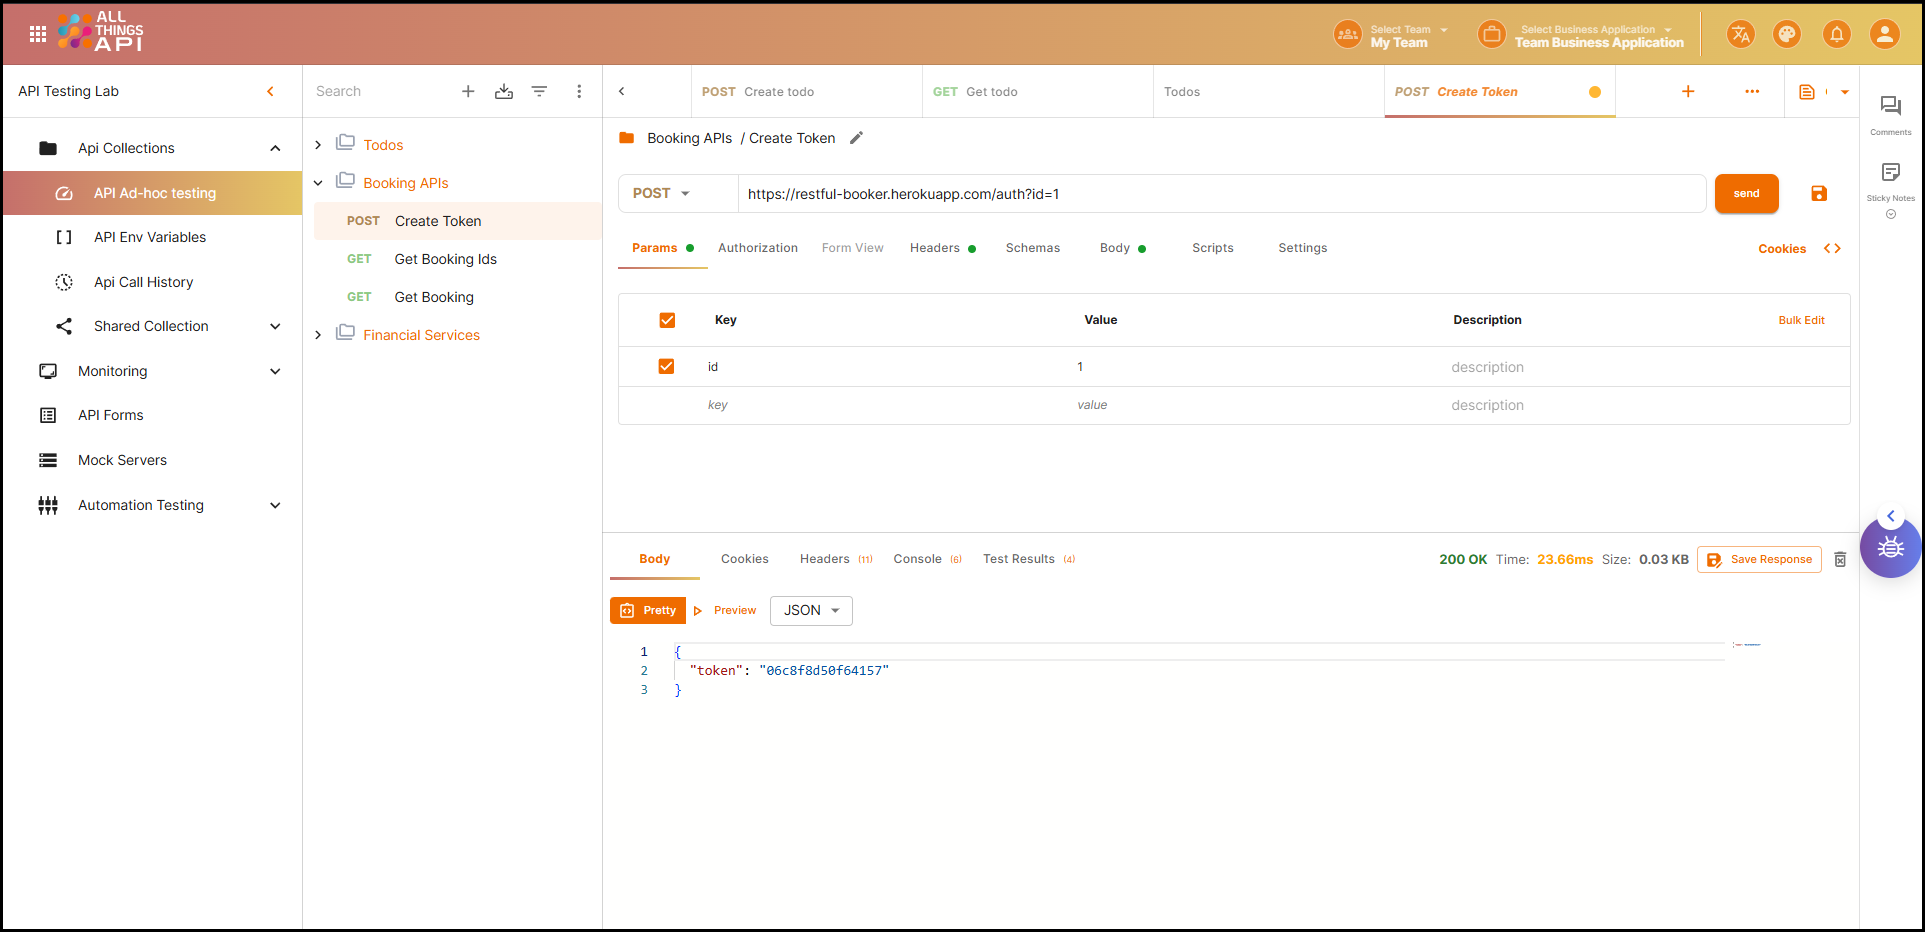
🔎 2. Add Parameters (Params)
Query parameters allow you to pass filters, data, or configuration values via the URL.
For example, this URL: https://api.example.com/users?role=admin
has a query parameter role with the value admin.
Steps:
- Click on the Params tab beside the URL field.
- Add your key-value pairs.
- Key: Name of the parameter (e.g.,
role) - Value: Value of the parameter (e.g.,
admin)
- Key: Name of the parameter (e.g.,
- ATA automatically appends them to the URL.
🔐 3. Set Authorization
Authentication ensures your API request is secure and accepted by the server. ATA supports various common methods.
Click on the Authorization tab to view and select options.
Supported Methods in ATA:
🔄 Inherit from Parent
Inherits auth from the collection or folder.
✅ Use when the same auth applies to multiple requests.
❌ No Auth
Use this when no authorization is required.
🔑 Basic Auth
Simple username/password authentication.
Fields:
- Username:
admin - Password:
admin123!
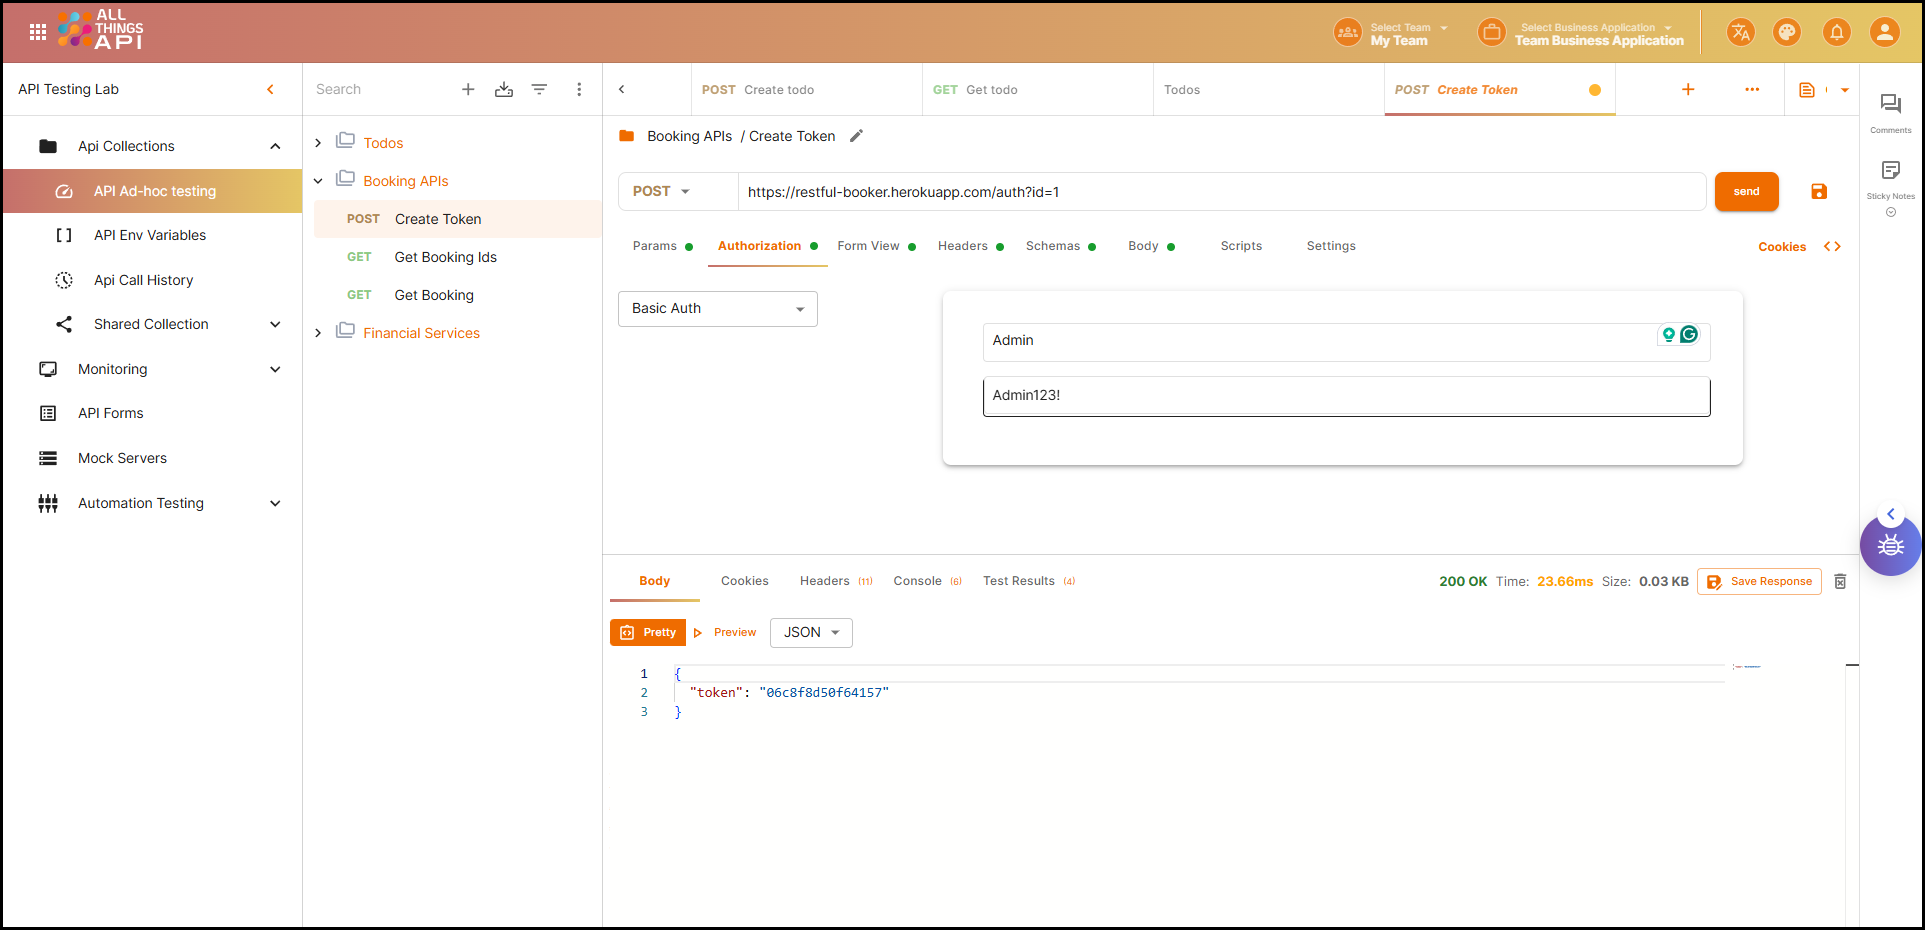
Base64-encoded and sent in the Authorization header.
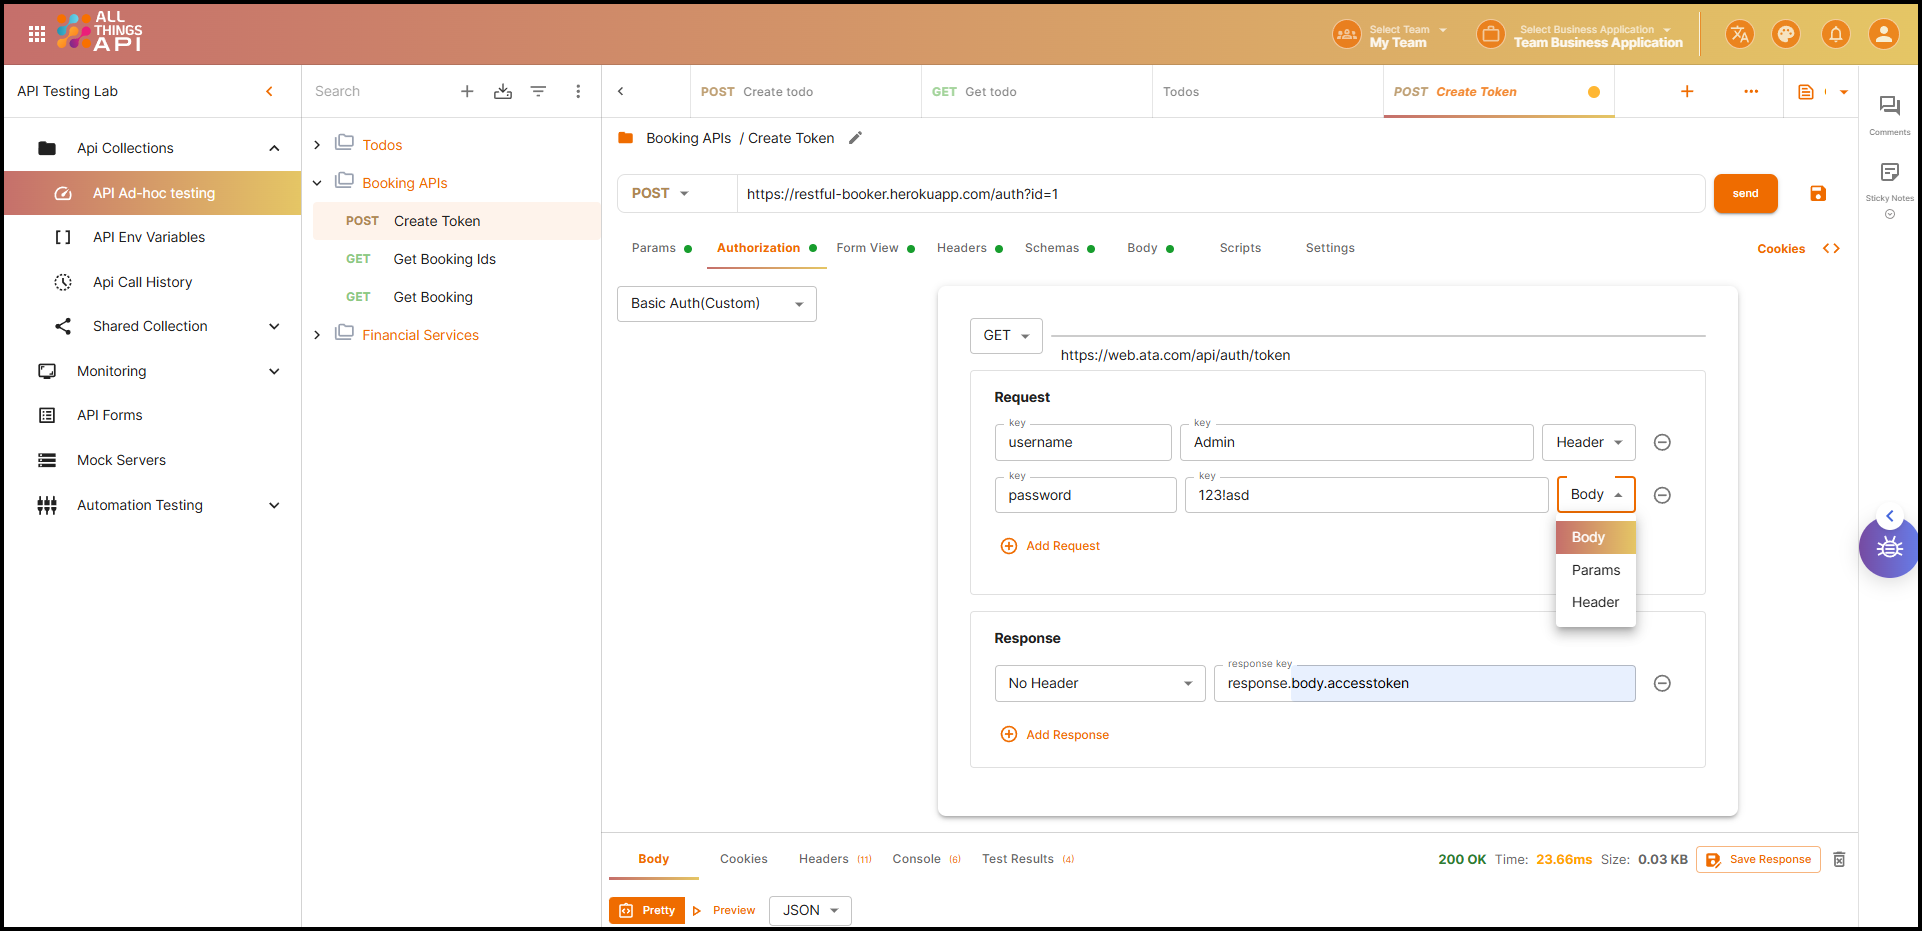
🧠 Basic Auth (Custom)
Used for multi-step login or custom logic.
Steps:
- Select HTTP method.
- Set Auth URL.
- Add headers/body to pass credentials.
- Define expected fields in response (e.g., token).
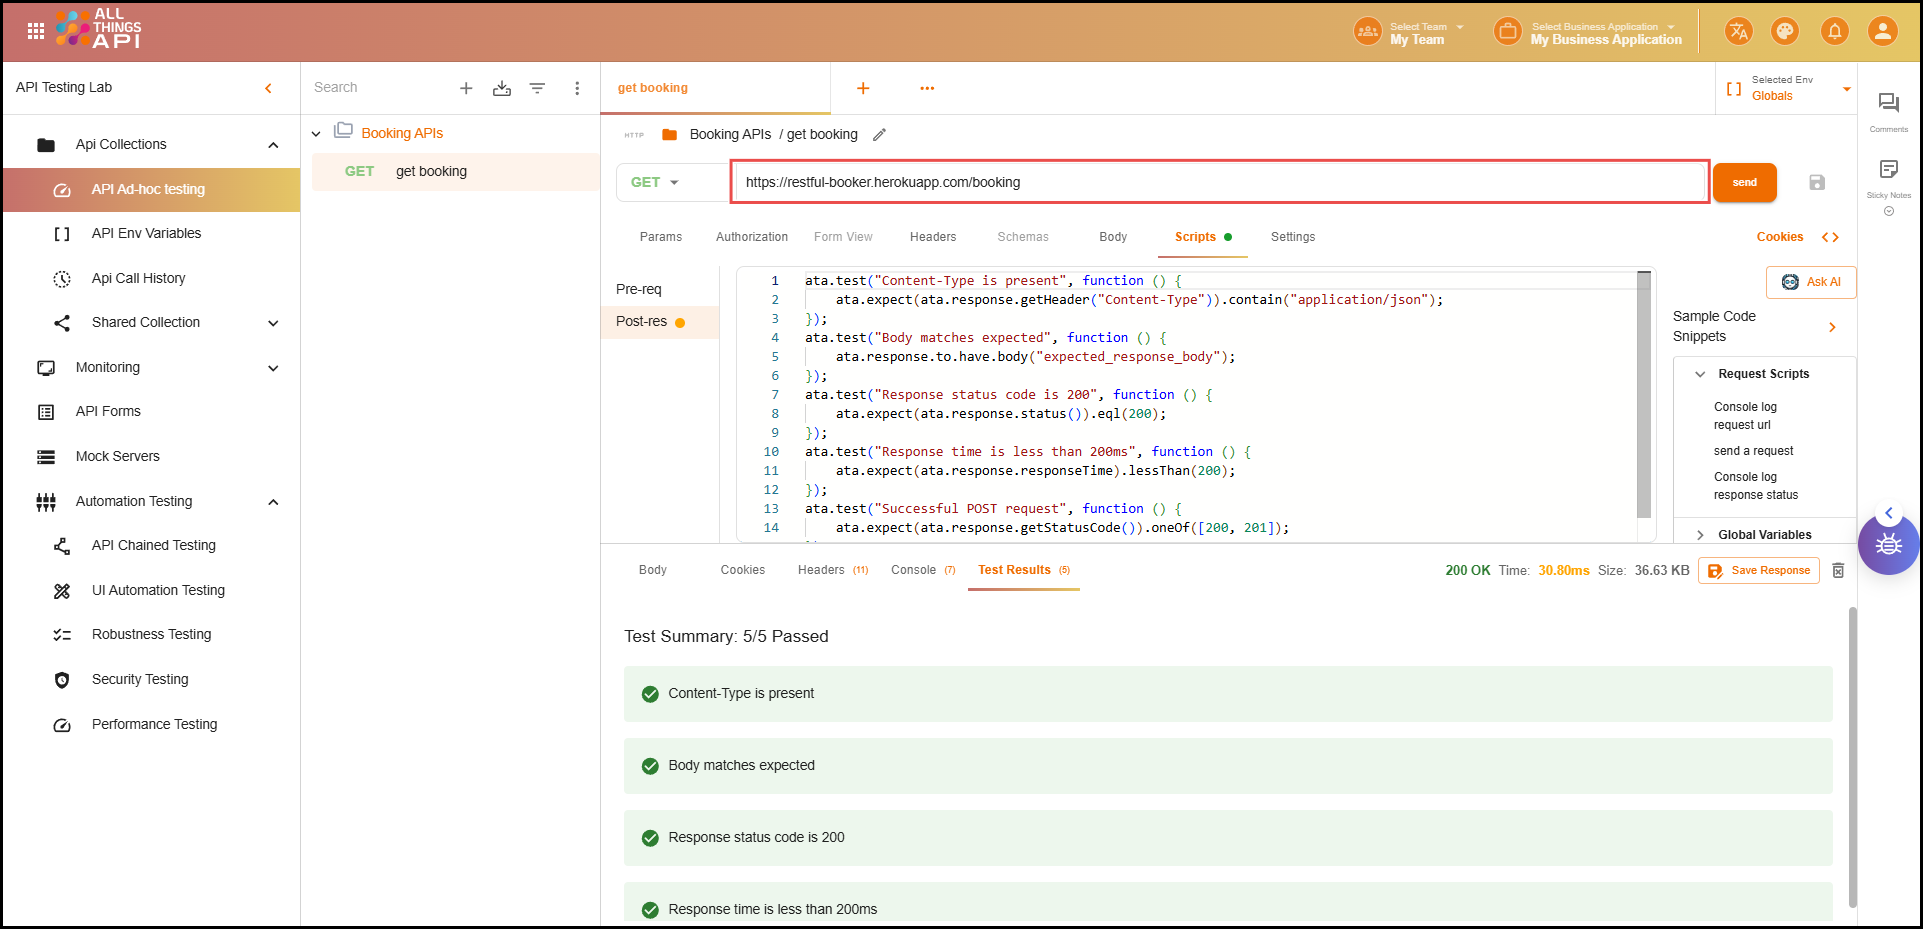
🧪 7. Add Test Scripts
Test scripts let you add validation logic after a request is executed. This is useful for:
- Verifying status codes
- Checking response structure or values
- Chaining variables or tokens for subsequent requests
Steps:
- Click on the Scripts tab in the request editor.
- Write test scripts using JavaScript syntax supported by ATA.
Example:
ata.test("Content-Type is present", function () {
ata.expect(ata.response.getHeader("Content-Type")).contain("application/json");
});
ata.test("Body matches expected", function () {
ata.response.to.have.body("expected_response_body");
});
ata.test("Response status code is 200", function () {
ata.expect(ata.response.status()).eql(200);
});
ata.test("Response time is less than 200ms", function () {
ata.expect(ata.response.responseTime).lessThan(200);
});
ata.test("Successful POST request", function () {
ata.expect(ata.response.getStatusCode()).oneOf([200, 201]);
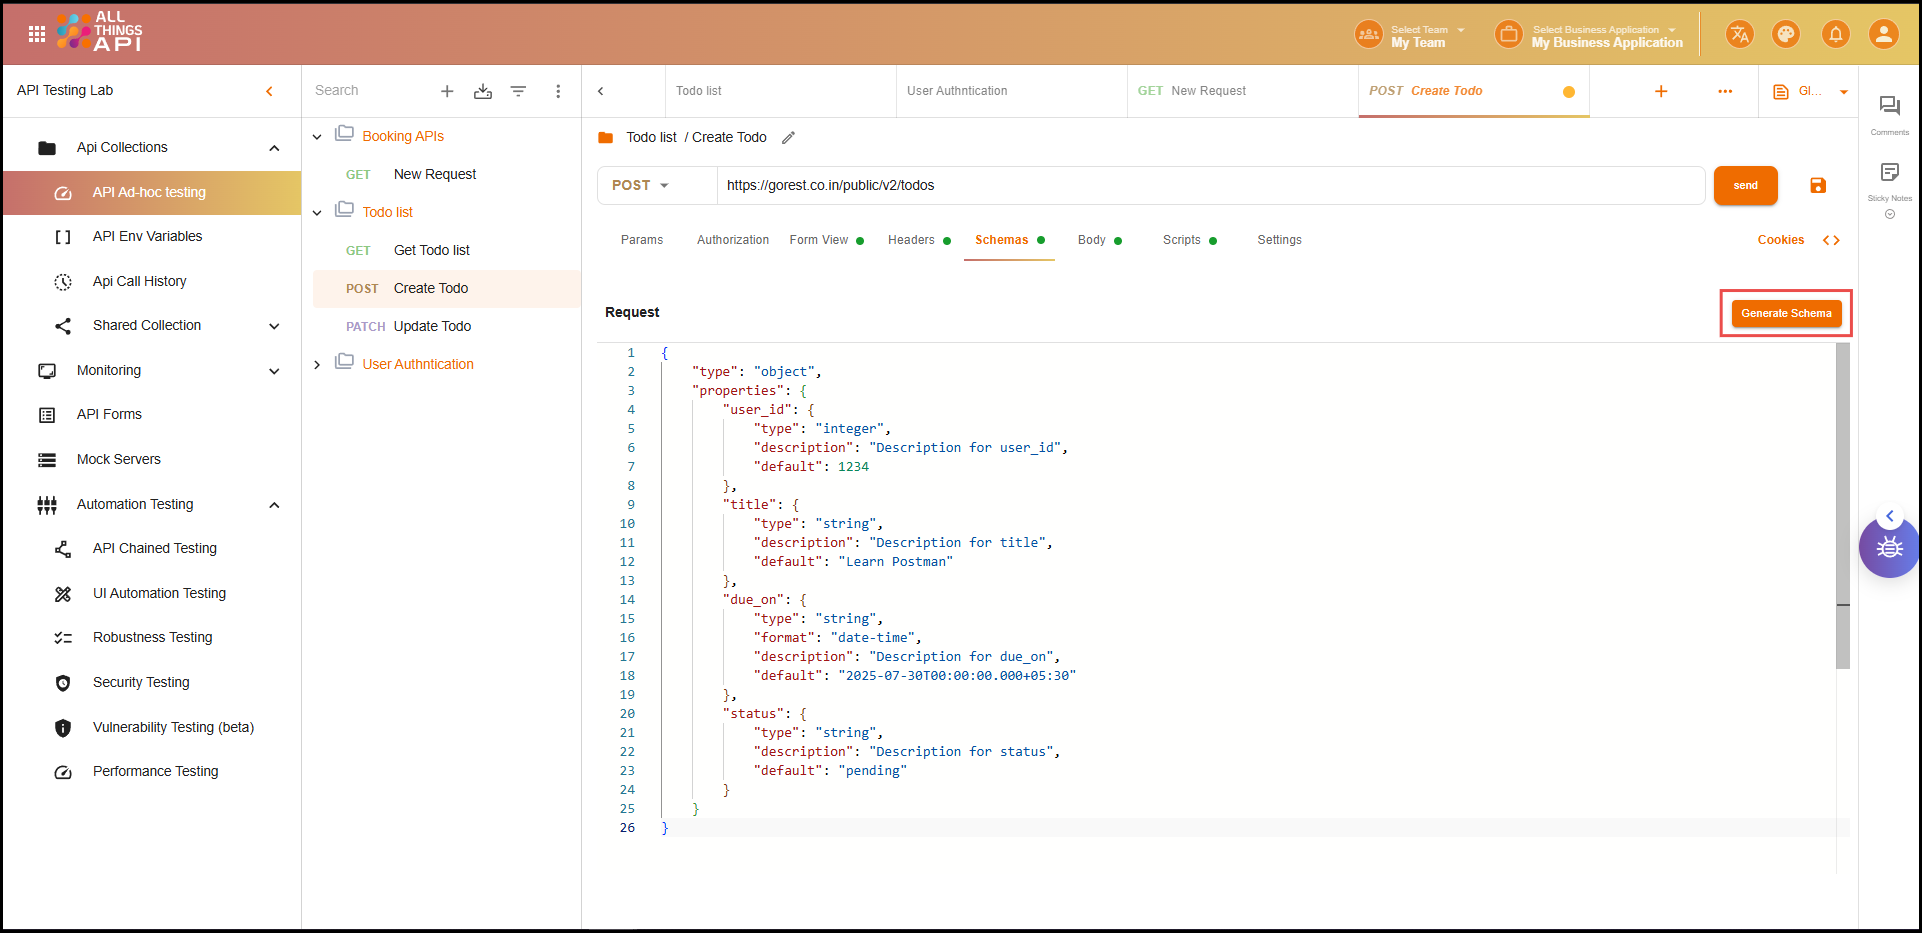
});🧬 8. Create Schemas
Why Use Schemas?
A schema defines the expected structure of your request or response. It helps enforce:
- ✅ Data consistency across environments
- ✅ Validation of required fields and types
- ✅ Easier onboarding for teams by documenting the contract
Schemas are essential when working with large-scale or team-based APIs to avoid breaking changes and unexpected inputs.
Steps to Create a Schema:
- Go to the Body tab and paste a sample JSON payload.
- Click “Generate Schema”.
- ATA will generate a schema with fields, types, and constraints.
- You can also manually:
- Add or remove fields
- Set required fields
- Define data types (
string,number,boolean, etc.) - Add validations like
min/max length,pattern, orenum
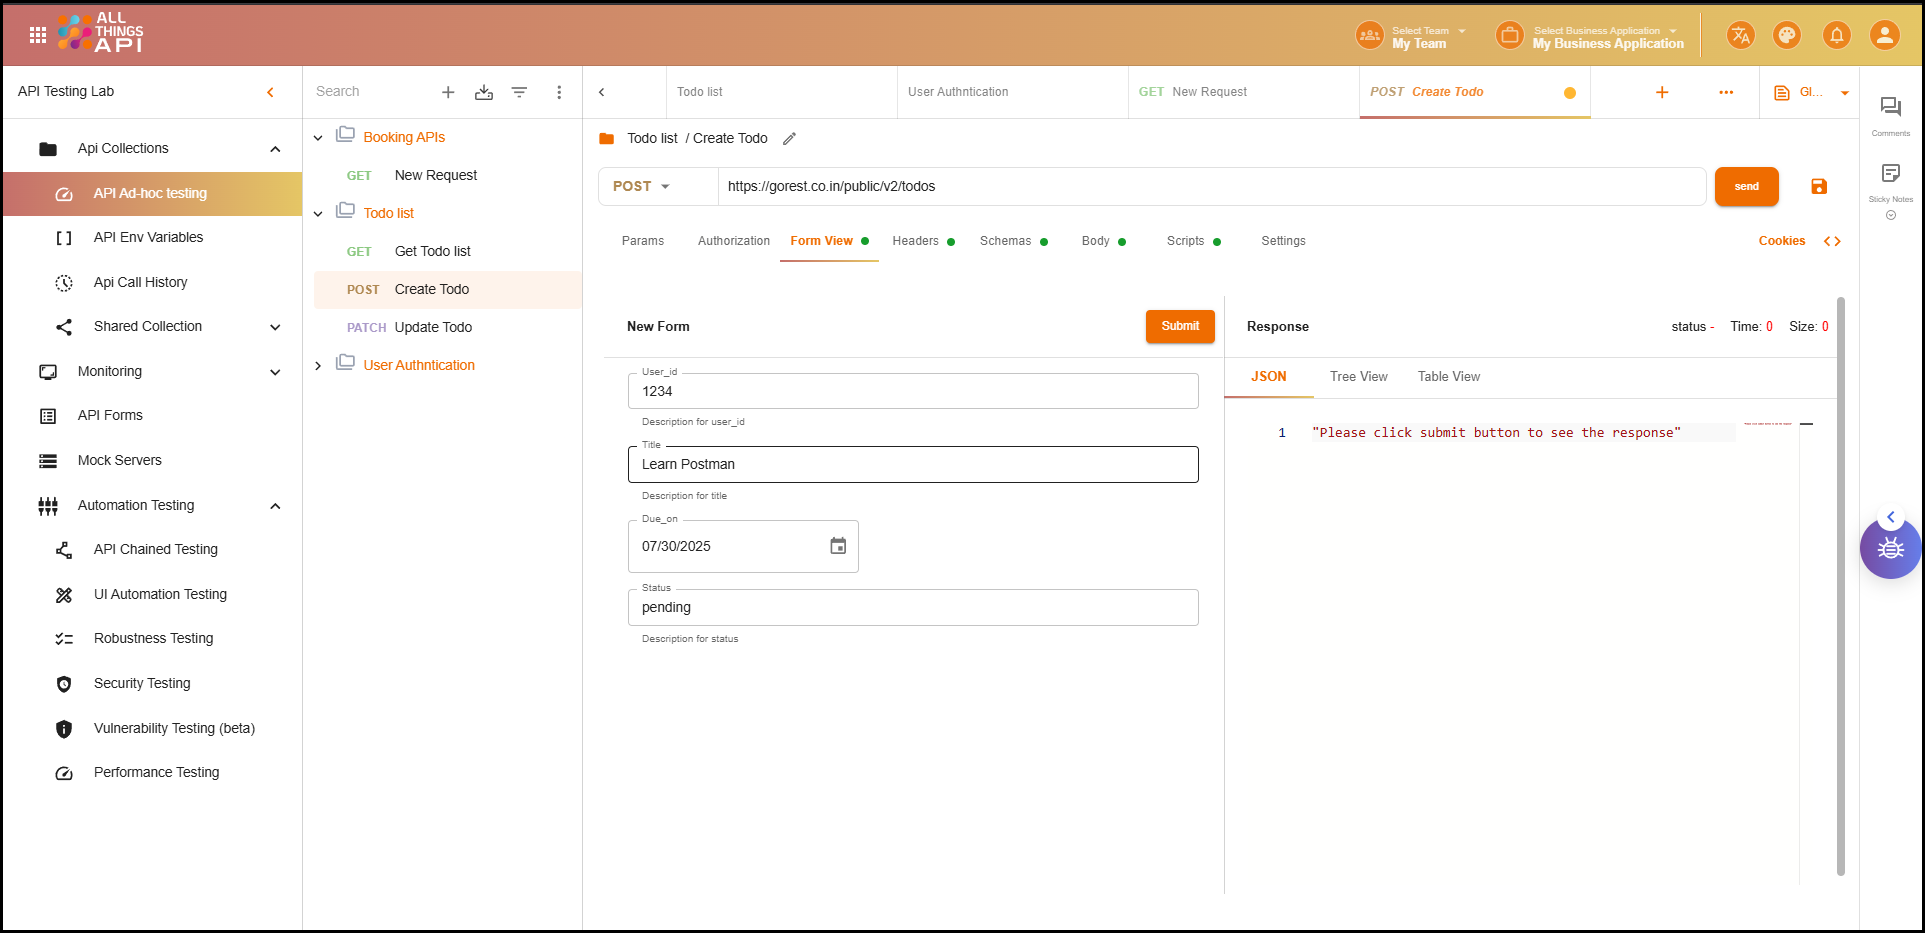
🧾 9. Use Form View
Why Form View?
Form View lets users fill out request data using a UI-based form generated from the schema. It helps:
- ✅ Non-developers interact with APIs
- ✅ Prevent formatting issues in JSON
- ✅ Speed up testing with pre-defined fields
Steps:
- Make sure a schema is linked to the request (via the Body).
- Click on the “Form View” tab next to Body.
- ATA will render input fields based on the schema.
- Fill in values using the form.
- ATA automatically generates the corresponding request body from your inputs.
Benefits:
- ✅ Easy navigation
- ✅ Reduces manual errors
- ✅ Ideal for demos, QA testing, or rapid iteration
📤 10. Send Request and View Response
Once all configurations are set — URL, method, headers, body, authorization, etc. — you’re ready to test the API.
Steps:
- Click the Send button in the request editor.
- ATA executes the request and shows the live response in the lower panel.
Response Panel Includes:
- Body: The actual response data from the server (e.g., JSON, HTML, XML).
- Status Code: Indicates if the request was successful (
200), invalid (400), failed (500), etc. - Execution Time: The time the server took to respond (e.g.,
23.66ms). - Size: Total size of the returned response payload (e.g.,
0.03 KB). - Headers: Includes metadata such as content type, server info, etc.
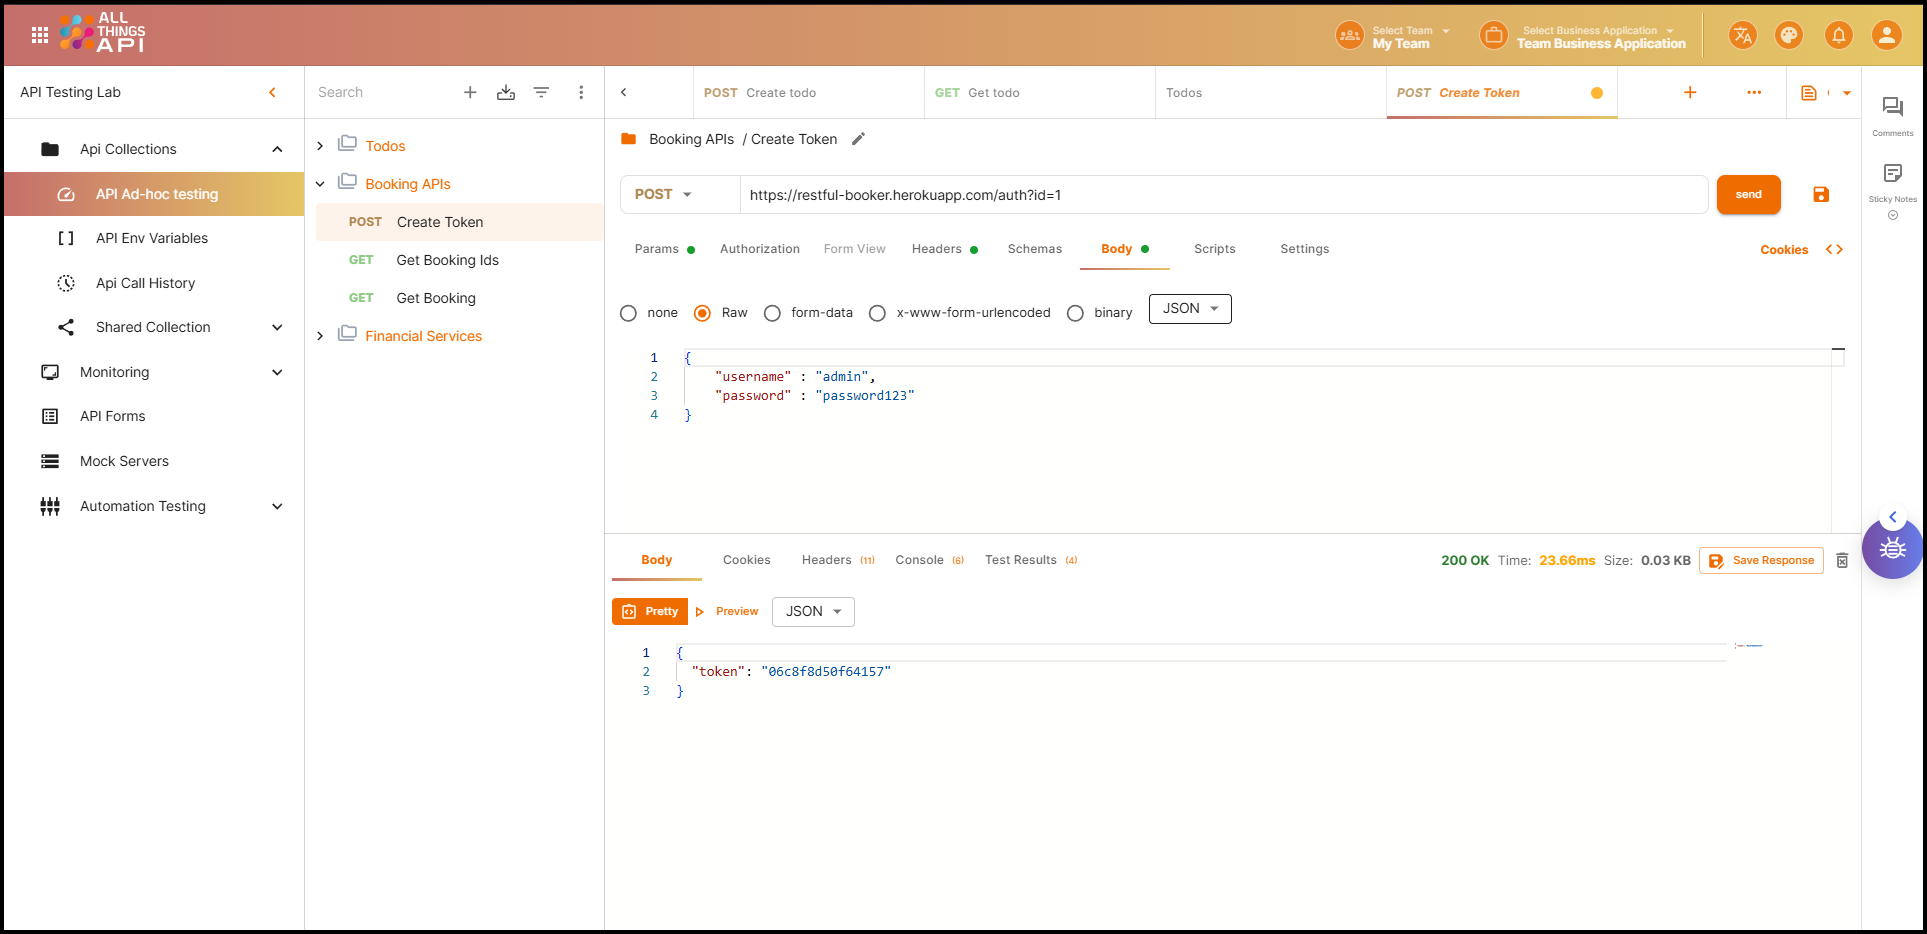
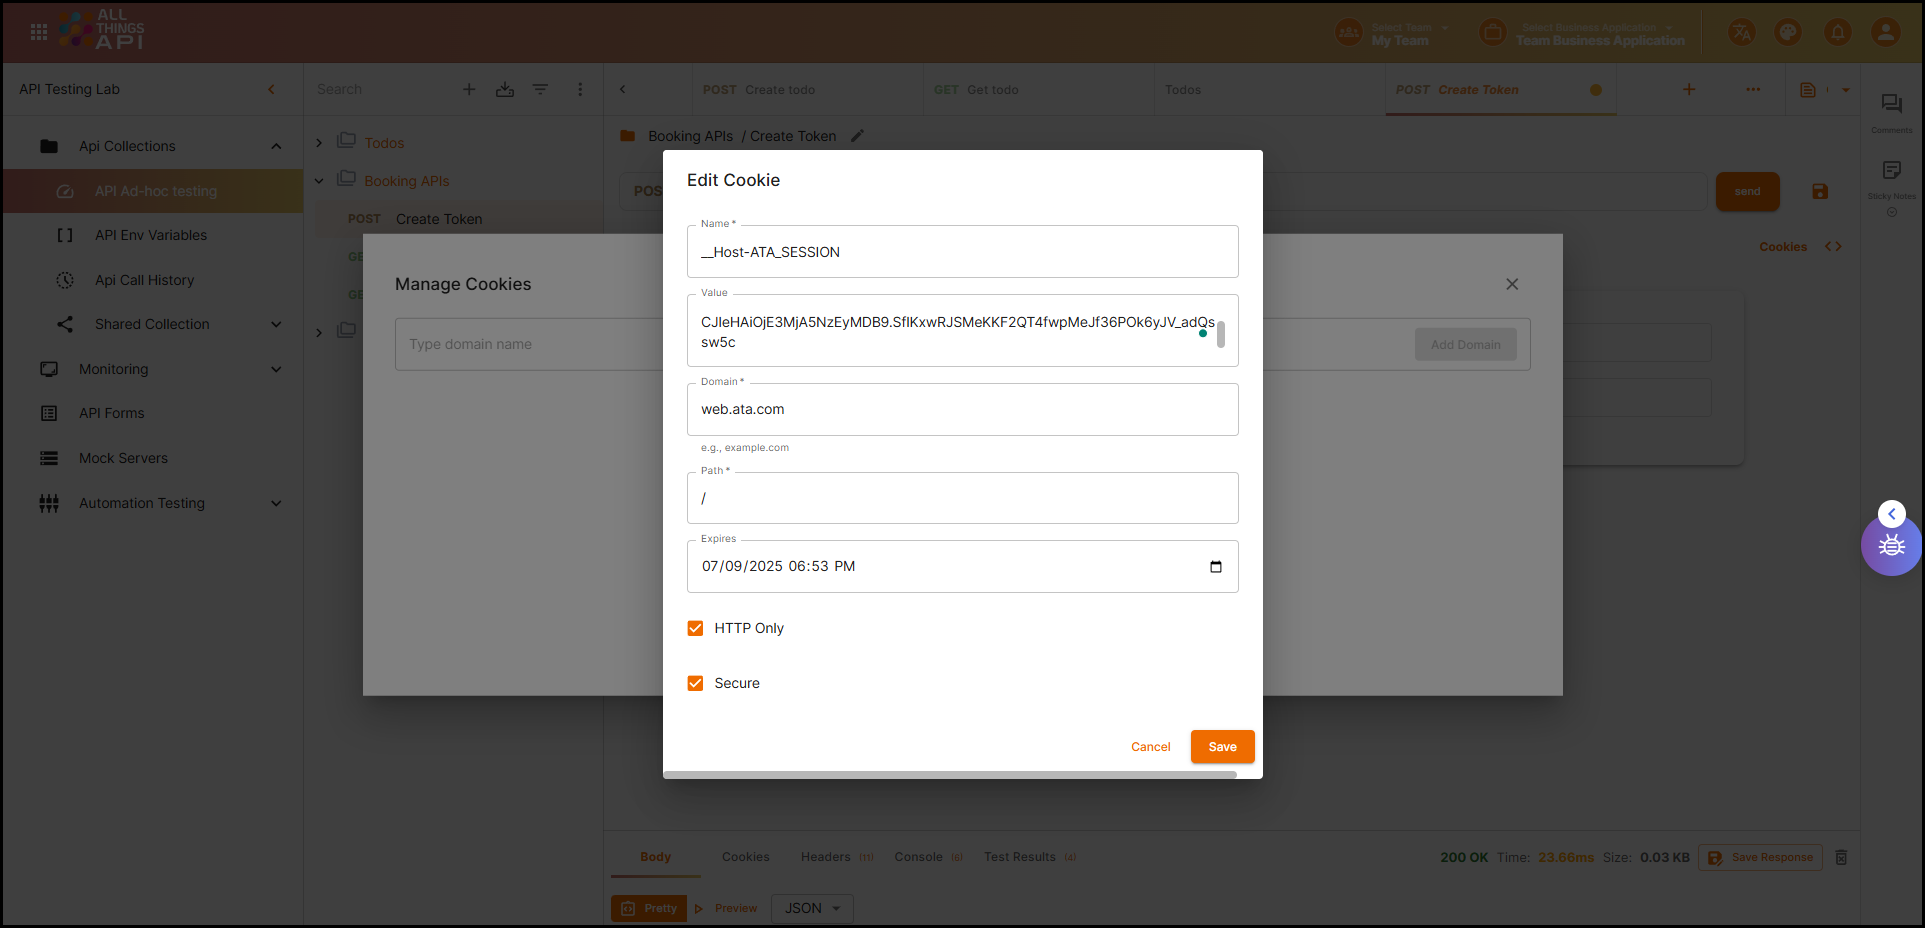
- Cookies: Any cookies returned by the server (if applicable).
All Things API (ATA) provides a robust and user-friendly environment for designing, executing, and validating API calls. From setting up request details and authentication to generating schemas, using form-based input, and analyzing real-time responses, ATA ensures a comprehensive and streamlined testing workflow.
By following the steps outlined in this guide, users—regardless of technical expertise—can confidently manage API requests with precision, maintain consistent test practices, and enhance collaboration across teams.
For advanced use cases, integration workflows, and automation features, refer to additional sections of the ATA documentation.